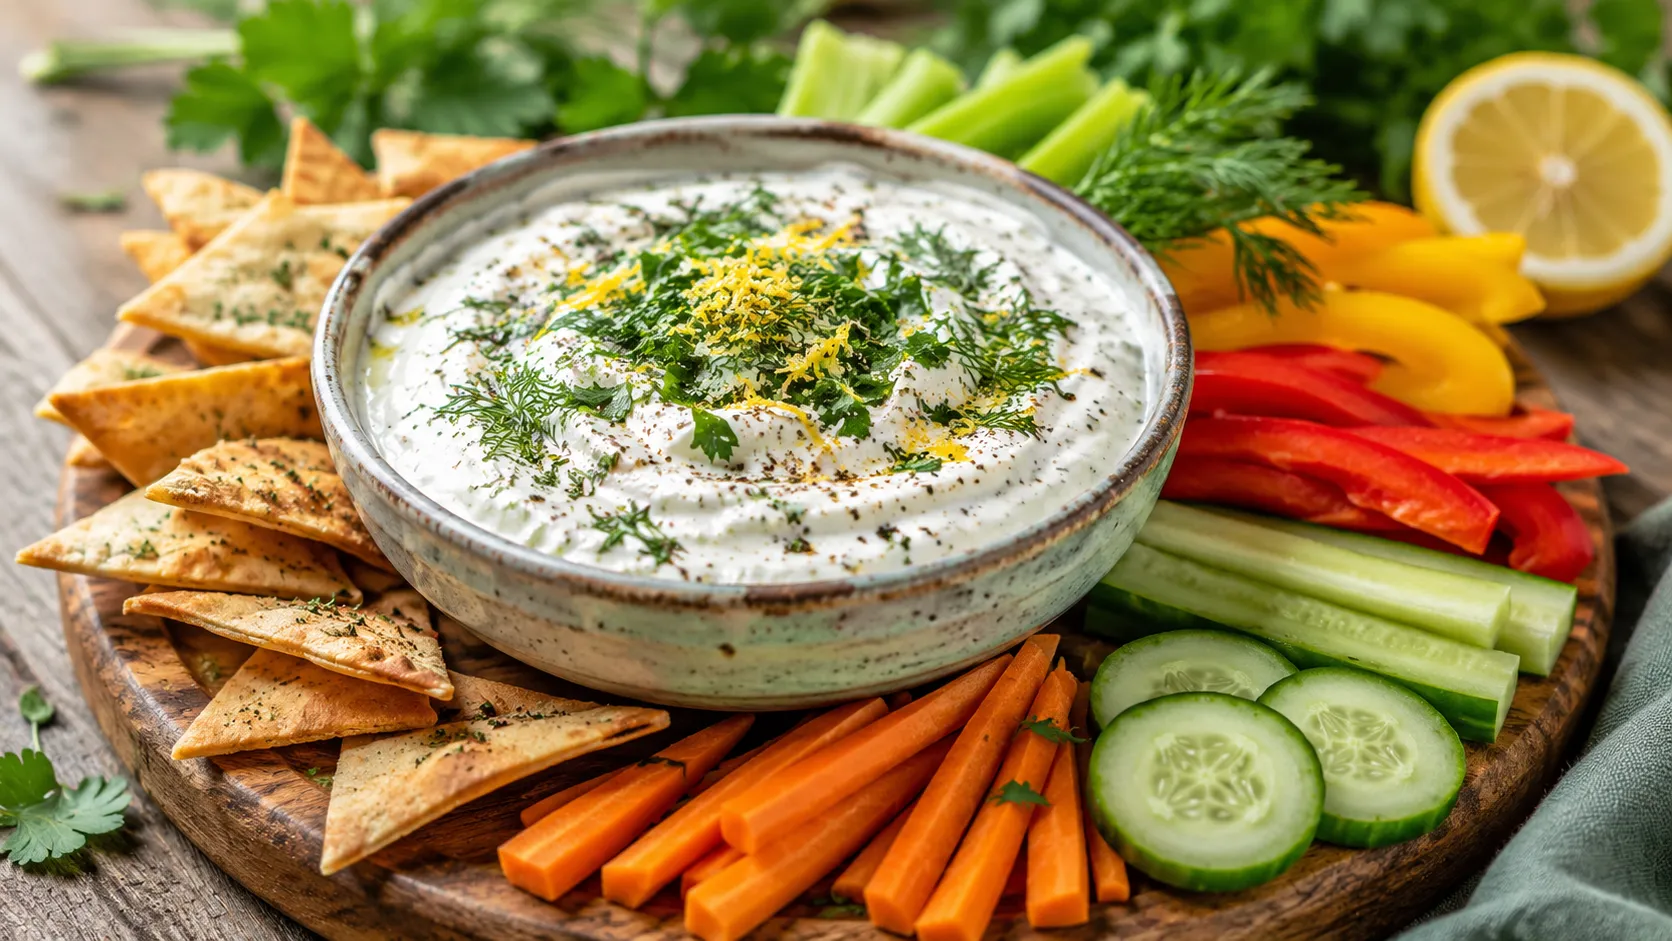
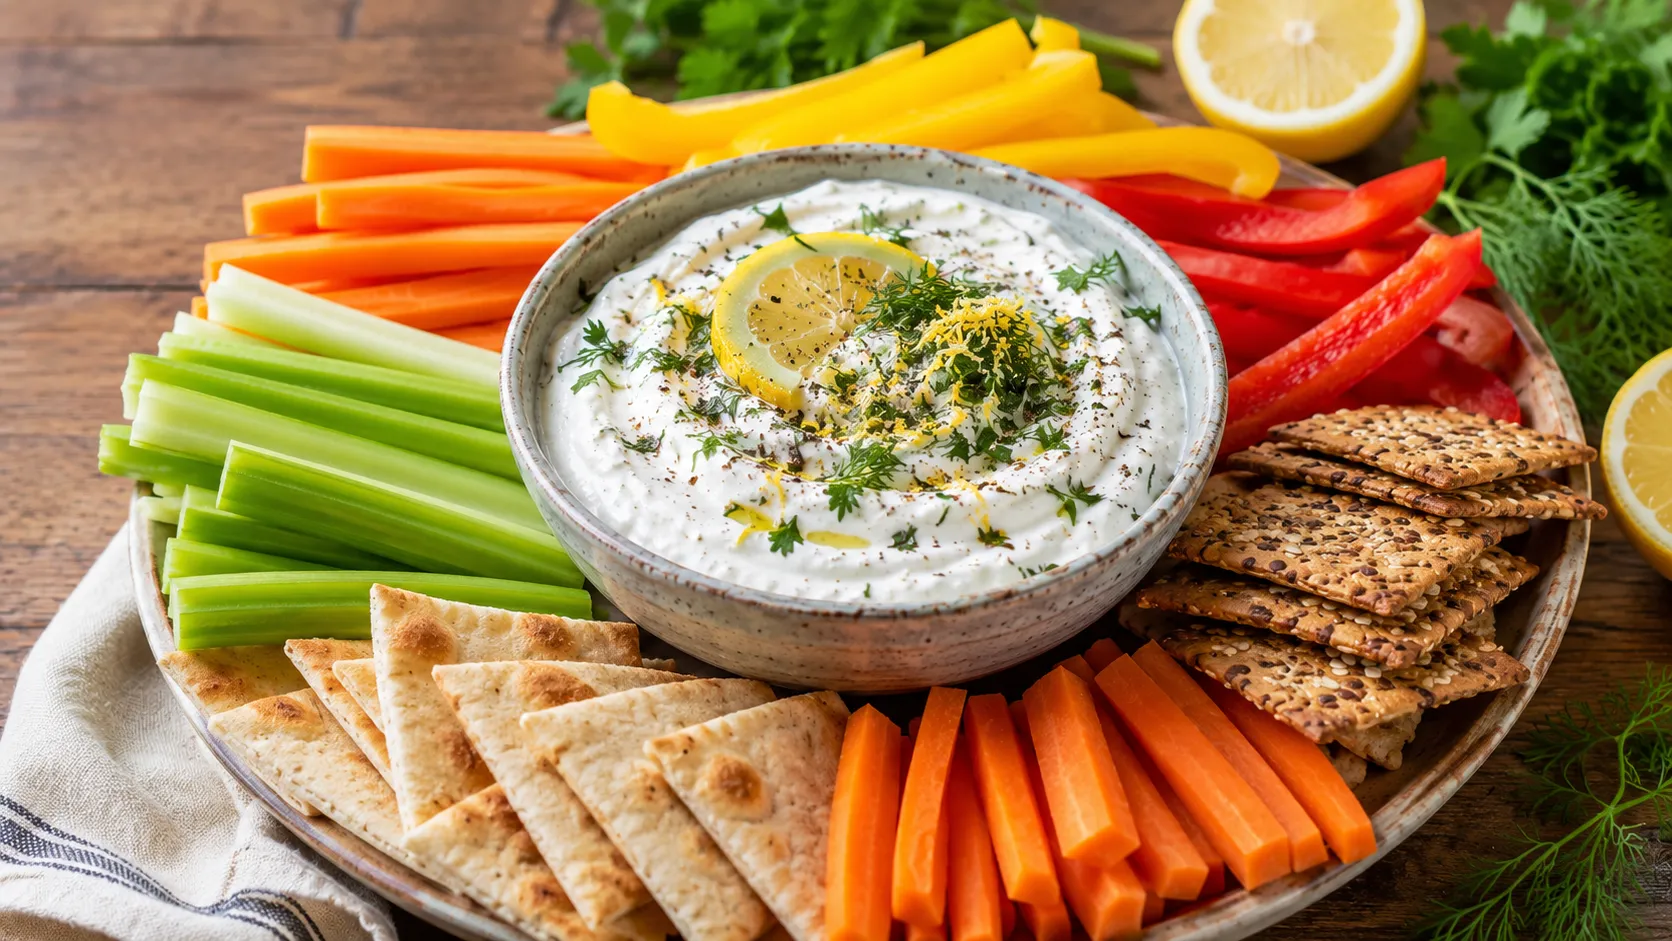
The Best Vegan Yogurt Dip Recipe is the kind of simple homemade dip that instantly makes snacks, appetizers, and meals feel more exciting. Creamy, tangy, fresh, and packed with flavor, it comes together with just a handful of ingredients and minimal effort.
This recipe is perfect for anyone looking for a dairy-free alternative that still delivers a rich and satisfying texture. The combination of vegan yogurt, herbs, garlic, and lemon creates a bright flavor that pairs beautifully with vegetables, crackers, wraps, and grilled dishes.
In my experience, homemade dips always taste fresher than store-bought versions. I’ve noticed this vegan yogurt dip is especially popular at gatherings because it feels light, refreshing, and versatile. Whether you’re preparing a quick snack or a party platter, this recipe is a reliable favorite.
Why You’ll Love This Recipe
This vegan yogurt dip is incredibly easy to prepare and requires no cooking, making it perfect for busy days. The creamy texture and fresh herb flavor make it feel special without requiring complicated ingredients.
You’ll love how versatile it is. Serve it as a snack dip, sandwich spread, salad dressing base, or appetizer for guests. The bright lemon flavor keeps it light while the garlic adds just the right amount of savory depth.
I’ve tried this recipe with many different vegetables and breads, and it works beautifully every time. It is naturally dairy-free, customizable, and beginner-friendly. Best of all, it tastes even better after chilling, making it ideal for make-ahead entertaining.
Ingredients
- 1½ cups plain unsweetened vegan yogurt
- 2 tablespoons fresh dill, finely chopped
- 2 tablespoons fresh parsley, finely chopped
- 2 cloves garlic, minced
- 1 tablespoon fresh lemon juice
- 1 teaspoon lemon zest
- 1 tablespoon extra virgin olive oil
- ½ teaspoon sea salt
- ¼ teaspoon black pepper
- 1 tablespoon chopped chives
These simple ingredients work together to create a creamy and flavorful dip with a fresh herbal finish. Using unsweetened vegan yogurt is important because flavored varieties can alter the taste. Fresh herbs provide the brightest flavor, while lemon juice adds a refreshing tang that balances the richness of the yogurt.
How to Make It
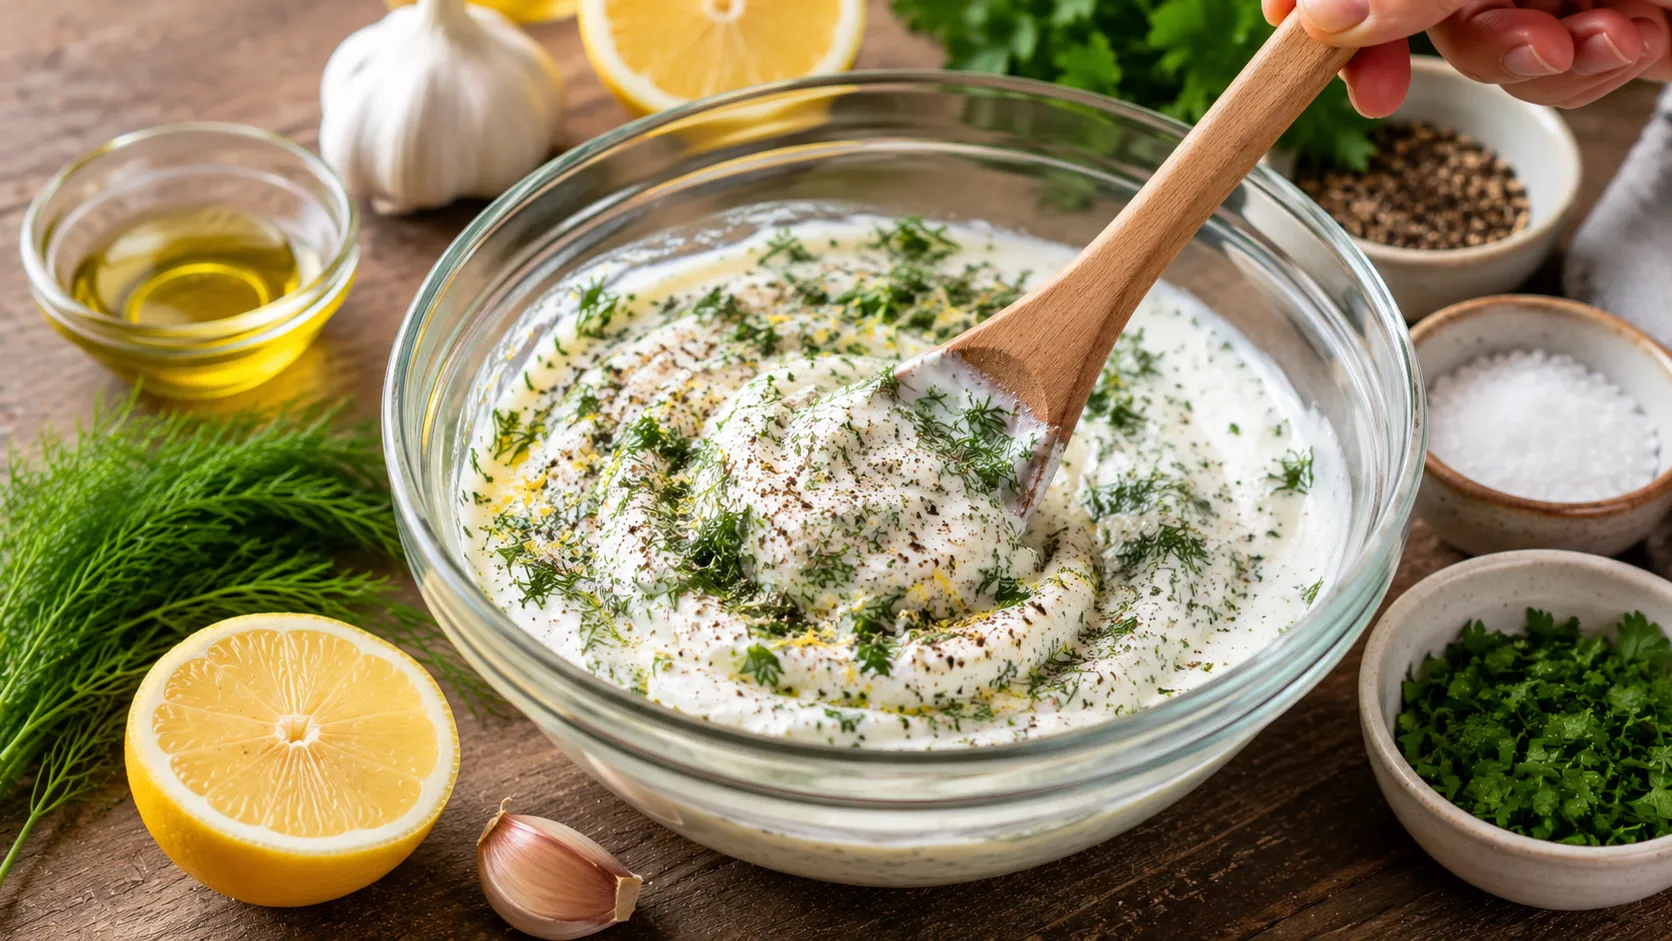
Step 1
Place the vegan yogurt into a medium-sized mixing bowl. Choose a thick and creamy yogurt variety because it creates the best texture for dipping. Add the lemon juice and olive oil to the bowl. Stir gently until the mixture becomes smooth and silky. This simple base helps distribute the flavors evenly throughout the dip. Taking a moment to fully combine these ingredients creates a more balanced final result and prevents any pockets of concentrated lemon or oil from remaining in the mixture.
Step 2
Add the minced garlic directly into the yogurt mixture. Fresh garlic provides a bold and savory flavor that complements the tanginess of the yogurt. Stir thoroughly to ensure the garlic is evenly distributed. If you prefer a milder flavor, allow the minced garlic to sit for a few minutes before mixing. I’ve noticed that finely minced garlic blends more smoothly into the dip and creates a better texture than larger pieces. Proper mixing at this stage helps build the foundation of the dip’s flavor.
Step 3
Add the chopped dill, parsley, and chives to the bowl. These herbs bring freshness, color, and aroma to the recipe. Stir carefully so the herbs spread evenly throughout the yogurt mixture. Fresh herbs create a more vibrant appearance and a brighter taste compared to dried herbs. In my experience, dill adds a classic dip flavor while parsley keeps the overall taste light and refreshing. The mixture should already begin looking colorful and appetizing at this stage.
Step 4
Sprinkle in the sea salt and black pepper. Stir again until all seasonings are fully incorporated. Taste the mixture and make small adjustments if needed. Some vegan yogurts are naturally tangier than others, so you may want a little extra salt or lemon juice. This tasting step is important because it allows you to customize the dip to your preference. The flavors should taste balanced, fresh, creamy, and slightly tangy without any single ingredient overpowering the others.
Step 5
Add the lemon zest and gently fold it into the dip. The zest provides a bright citrus aroma that enhances the freshness of the herbs. Stir carefully to distribute it evenly without overmixing. I’ve tried this both with and without lemon zest, and the difference is noticeable. The zest adds an extra layer of flavor that makes the dip taste more vibrant and homemade. It also contributes tiny bursts of citrus throughout every bite.
Step 6
Cover the bowl tightly with a lid or plastic wrap. Place it in the refrigerator for at least 30 minutes. Chilling allows the garlic, herbs, and lemon to blend together and develop a deeper flavor. While the dip is already tasty immediately after mixing, resting time significantly improves the final result. I’ve seen this work well when preparing the dip ahead of parties because the flavor becomes richer and more balanced as it sits in the refrigerator.
Step 7
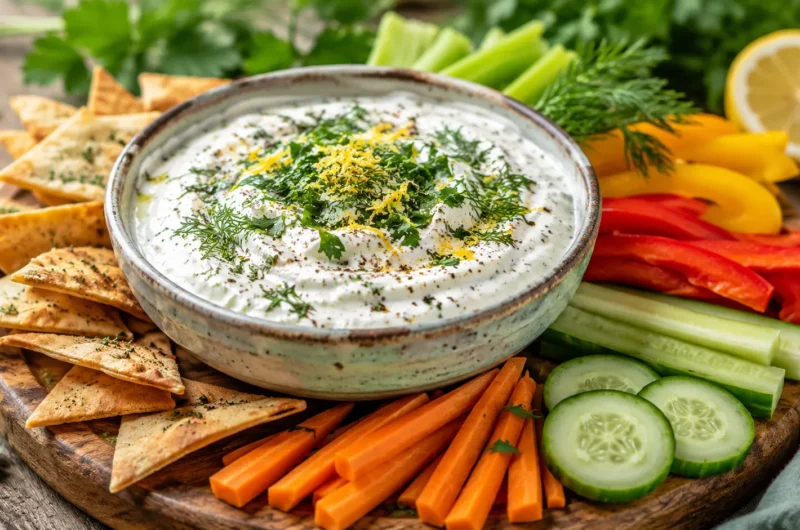
Remove the chilled dip from the refrigerator and give it one final stir before serving. Check the consistency and adjust if necessary. If it seems too thick, add a small spoonful of vegan yogurt. If it seems thin, allow it to chill a little longer. Transfer the dip to a serving bowl and garnish with additional herbs, lemon zest, or cracked black pepper. Serve immediately alongside vegetables, crackers, pita bread, or your favorite snacks.
Cooking Tips / Variations
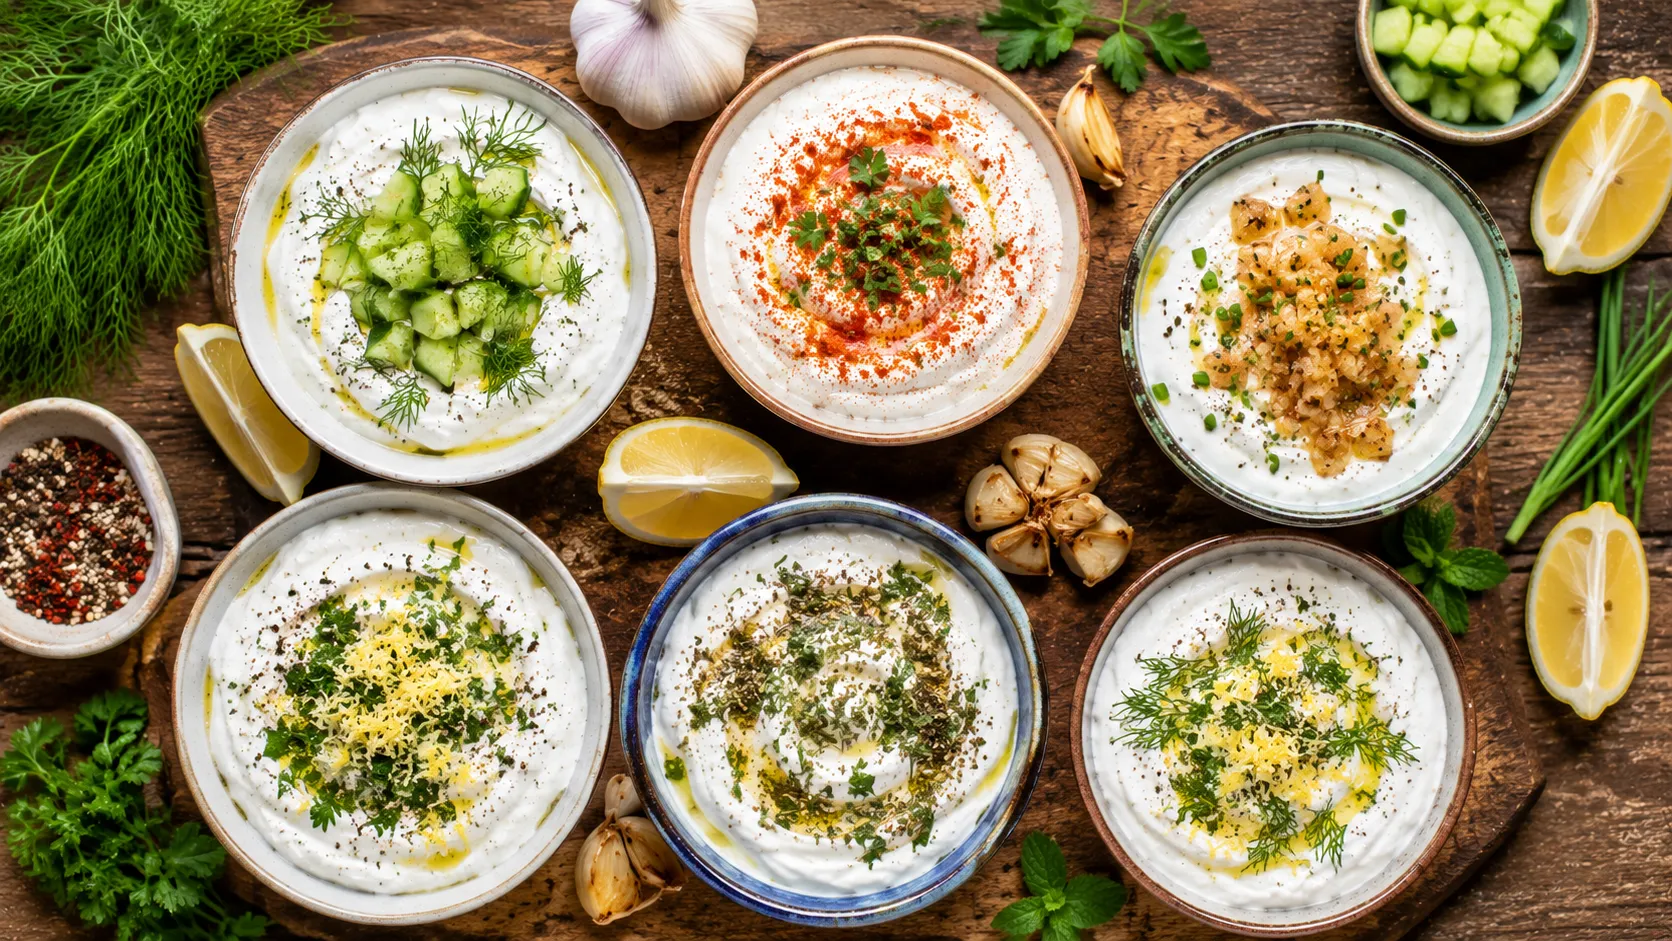
This recipe is highly adaptable and easy to customize. For a Mediterranean-inspired version, add finely chopped cucumber and extra dill. For a smoky flavor, stir in a pinch of smoked paprika. Roasted garlic can replace fresh garlic if you prefer a milder taste.
If you enjoy spicy foods, add a small amount of red pepper flakes. Fresh mint also works beautifully alongside the herbs. I’ve tried several combinations, and the yogurt base remains versatile and flavorful. The key is balancing fresh herbs with the creamy yogurt so no single ingredient dominates the dip.
Serving or Storage Tips
Serve this dip chilled for the best flavor and texture. It pairs wonderfully with carrots, cucumbers, celery, crackers, pita chips, wraps, and sandwiches. It can even be used as a light dressing for grain bowls or salads.
Store leftovers in an airtight container in the refrigerator for up to four days. Stir before serving because some separation may occur naturally. I’ve noticed the flavor often becomes even better after a day in the refrigerator. Avoid freezing, as the texture may become grainy when thawed. Fresh herbs are best added just before serving if making the dip several days ahead.
Conclusion
This recipe proves that simple ingredients can create something truly delicious. The creamy texture, fresh herbs, bright lemon flavor, and easy preparation make it a recipe you’ll return to again and again.
Whether you’re hosting guests, preparing a healthy snack, or adding flavor to everyday meals, the Best Vegan Yogurt Dip Recipe is a wonderful choice. It is fresh, versatile, beginner-friendly, and packed with flavor.
Save this recipe on Pinterest for later, give it a try in your own kitchen, and share it with family and friends. Once you taste this homemade dip, you’ll want to keep it on your regular recipe rotation. Happy cooking!
Best Vegan Yogurt Dip Recipe
6
servings15
minutes15
minutesThis creamy Vegan Labneh with Soy or Almond Yogurt transforms simple dairy-free yogurt into a rich, tangy Mediterranean-style spread that’s perfect for dipping, spreading, and sharing.
Ingredients
2 cups plain unsweetened soy yogurt
2 cups plain unsweetened almond yogurt
1 teaspoon sea salt
1 tablespoon extra virgin olive oil
1 teaspoon lemon juice
1 small garlic clove, finely grated
1 teaspoon za’atar seasoning
1 tablespoon chopped fresh parsley
1 tablespoon chopped fresh dill
Freshly cracked black pepper to taste
How to Make it
- Start by selecting a high-quality unsweetened soy or almond yogurt. The thicker the yogurt, the better your final labneh will become. Place a fine mesh strainer over a large bowl and line it with cheesecloth, a nut milk bag, or a clean kitchen towel. Stir the salt into the yogurt before transferring it into the lined strainer. This simple step helps enhance flavor while encouraging excess moisture to drain away during the straining process. Make sure the bowl underneath has enough space to catch the liquid that will slowly separate from the yogurt.
- Carefully spoon the yogurt mixture into the prepared cheesecloth-lined strainer. Spread it gently into an even layer without pressing down too firmly. Fold the edges of the cloth over the top to protect the yogurt while it chills. Place the entire setup into the refrigerator and allow it to strain undisturbed. During this time, the yogurt gradually loses moisture and becomes thicker. I’ve noticed that patience is important here because rushing the process can leave the labneh too soft and less creamy than desired.
- Allow the yogurt to strain for at least 12 hours. For a thicker, more traditional texture, leave it for 18 to 24 hours. Check occasionally to see how much liquid has collected in the bowl below. The longer it strains, the firmer and richer the labneh becomes. If you prefer a spreadable consistency for sandwiches or toast, 12 hours may be enough. For dipping platters and appetizer boards, the longer straining period usually creates a more satisfying texture that holds its shape beautifully.
- Once the yogurt has reached your desired consistency, carefully remove it from the refrigerator. Open the cheesecloth and transfer the thickened labneh into a clean mixing bowl. You should notice a dramatic change in texture. It will look creamy, dense, and similar to soft cheese. Stir gently to smooth it out. At this stage, you can taste and adjust the seasoning if needed. A small pinch of extra salt often enhances the flavor even further without overpowering the natural tanginess.
- Add the lemon juice and grated garlic to the thickened labneh. Stir until everything is evenly incorporated. The lemon brightens the flavor while the garlic adds subtle savory depth. Mix gently to preserve the silky texture. In my experience, fresh garlic creates the best flavor, but it should be used sparingly so it doesn’t dominate the delicate yogurt taste. This combination creates a balanced spread that pairs beautifully with vegetables, crackers, pita bread, and grain bowls.
- Transfer the finished labneh to a serving bowl and smooth the surface with the back of a spoon. Create a shallow swirl on top to hold the olive oil. Drizzle generously with extra virgin olive oil and sprinkle with za’atar seasoning, parsley, dill, and freshly cracked black pepper. These simple toppings transform the appearance and add layers of flavor. The contrast between creamy labneh, fragrant herbs, and rich olive oil creates an inviting presentation that feels restaurant-worthy while remaining easy to prepare at home.
- Serve immediately or refrigerate for an hour before serving if you prefer a firmer texture. Pair it with warm pita bread, fresh cucumbers, carrots, cherry tomatoes, or crackers. The chilled labneh develops even deeper flavor as it rests. I’ve tried serving it as part of a Mediterranean mezze board, and it always disappears quickly. The creamy texture and tangy flavor make it a crowd-pleasing addition to gatherings, meal prep lunches, and healthy snack platters throughout the week.
Notes
- Use plain unsweetened yogurt for the most authentic flavor.
- Longer straining creates a thicker, cheese-like texture.
- Soy yogurt generally produces the richest and firmest results.
- Fresh herbs and olive oil greatly enhance the final presentation.
- Store chilled and stir gently before serving leftovers.
FAQ 1: What is the best vegan yogurt to use for this dip?
A thick, unsweetened vegan yogurt works best. Coconut, almond, oat, or soy-based yogurts are all good options. For the Best Vegan Yogurt Dip Recipe, choose a plain variety with a creamy consistency to achieve the smoothest texture.
FAQ 2: Can I make the Best Vegan Yogurt Dip Recipe ahead of time?
Yes. This dip is actually better when made a few hours ahead because the flavors have time to blend. Prepare it up to one day in advance and keep it refrigerated until ready to serve.
FAQ 3: How long does vegan yogurt dip last in the refrigerator?
When stored in an airtight container, the dip stays fresh for about four days. Stir before serving to restore its creamy texture and fresh appearance.
FAQ 4: What can I serve with vegan yogurt dip?
This dip pairs well with fresh vegetables, pita chips, crackers, wraps, sandwiches, grain bowls, and roasted vegetables. It also works as a flavorful spread for burgers and sandwiches.
FAQ 5: Can I customize the Best Vegan Yogurt Dip Recipe?
Absolutely. You can add cucumber, mint, roasted garlic, paprika, chives, or red pepper flakes. Small adjustments allow you to create different flavor profiles while keeping the creamy yogurt base intact.