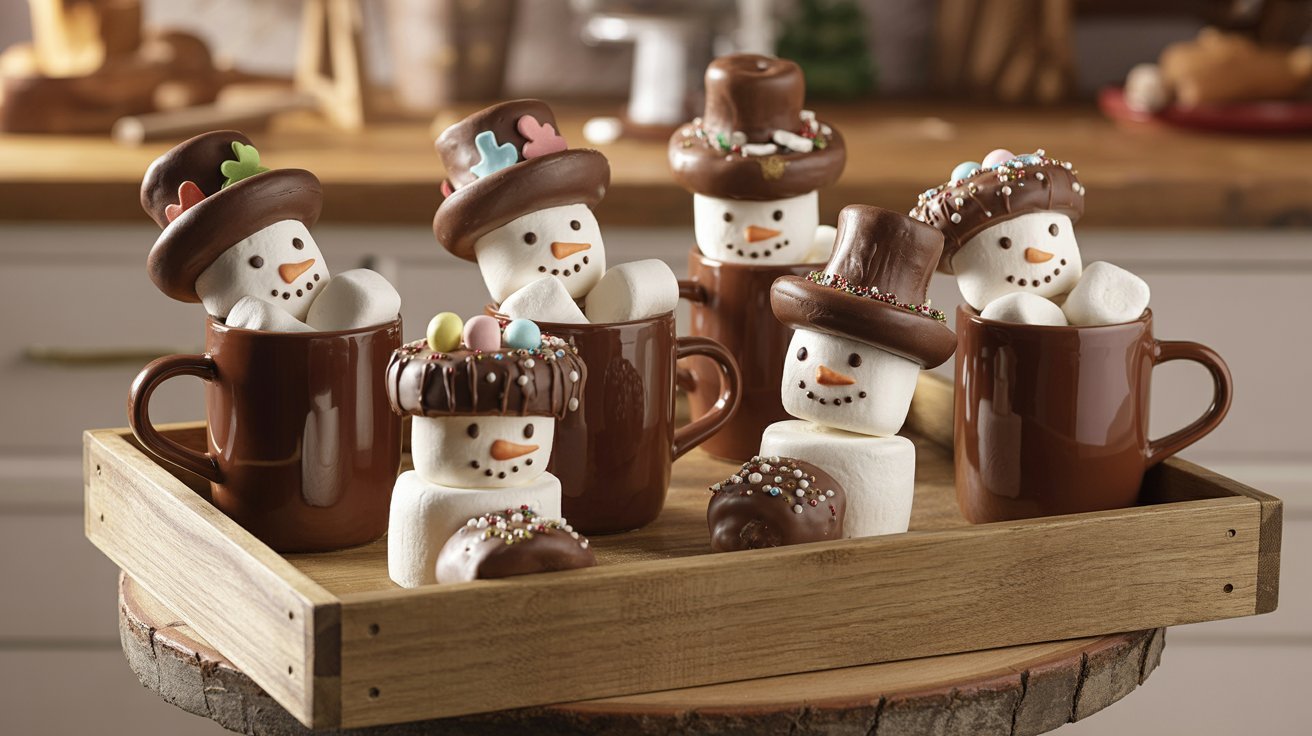
Marshmallow Hot Cocoa Mugs & Snowmen Hats are the kind of adorable winter treats that instantly make a holiday table feel magical. These sweet no-bake goodies combine fluffy marshmallows, melted chocolate, colorful candy decorations, and cozy hot cocoa flavors into one festive dessert everyone notices first. They are playful, beginner-friendly, and surprisingly easy to make at home.
What makes this recipe extra special is how creative and customizable it feels without being complicated. In my experience, recipes like this become instant favorites during holiday parties, classroom events, and family movie nights because they look impressive but require very little actual baking skill. I’ve noticed kids especially love helping decorate the tiny snowmen hats and cocoa mug details.
The texture is soft, chewy, creamy, and slightly crunchy from the candy toppings. Every bite tastes like sweet hot chocolate wrapped into a fun holiday dessert. They also photograph beautifully for Pinterest, making them perfect for cookie trays, edible gifts, or winter dessert boards.
Why You’ll Love This Recipe
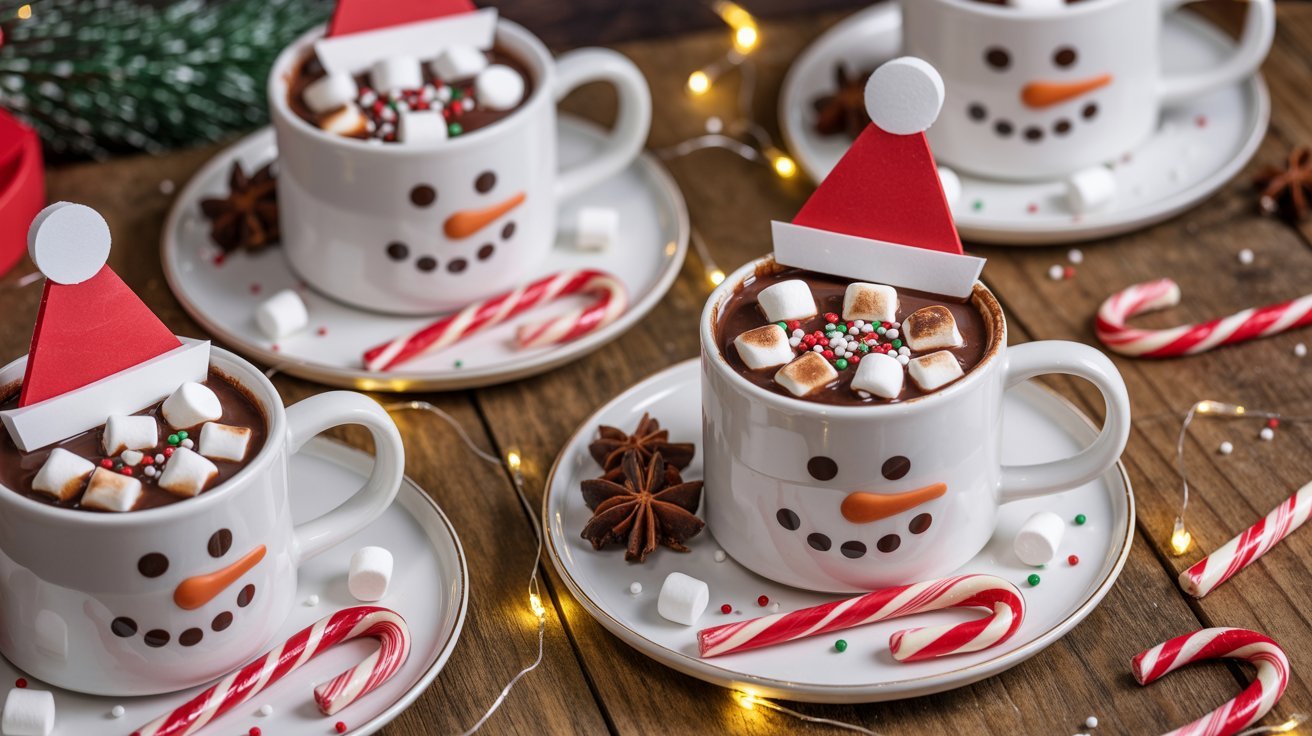
These Marshmallow Hot Cocoa Mugs & Snowmen Hats are one of those recipes that instantly bring warmth and holiday charm to the kitchen. They are easy enough for beginners but still look creative and bakery-worthy. Since there’s no complicated baking involved, the recipe feels fun instead of stressful, especially during busy holiday weeks.
One of the best things about this treat is how versatile it is. You can decorate each marshmallow differently, making every piece unique and festive. I’ve tried these with different candies and sprinkles, and they always turn out adorable. The chocolate coating adds richness while the marshmallows stay soft and fluffy inside.
They’re also perfect for Pinterest-worthy dessert tables, homemade gifts, winter birthdays, or cozy family nights with hot cocoa nearby. The combination of sweet chocolate aroma and colorful decorations creates a cheerful holiday mood almost instantly.
Ingredients
- 8 large marshmallows
- 1 cup milk chocolate chips
- ½ cup white chocolate melts
- 8 mini peanut butter cups
- 16 pretzel stick pieces
- ¼ cup mini marshmallows
- 2 tablespoons crushed peppermint candy
- 2 tablespoons holiday sprinkles
- 1 tablespoon coconut oil
- Black decorating gel
- Orange candy pearls or orange icing
- Red candy ribbons or fruit leather strips
These simple ingredients work together to create festive treats that look far more detailed than they actually are. The marshmallows stay soft and fluffy while the chocolate coating creates structure and sweetness. In my experience, using good-quality melting chocolate makes decorating much easier and gives the treats a smoother finish.
The pretzel pieces create realistic cocoa mug handles while the mini peanut butter cups make adorable snowmen hats. Small decorative candies help add personality without requiring advanced decorating skills. Everything comes together quickly, making this recipe ideal for holiday parties or last-minute dessert trays.
How to Make It
Step 1
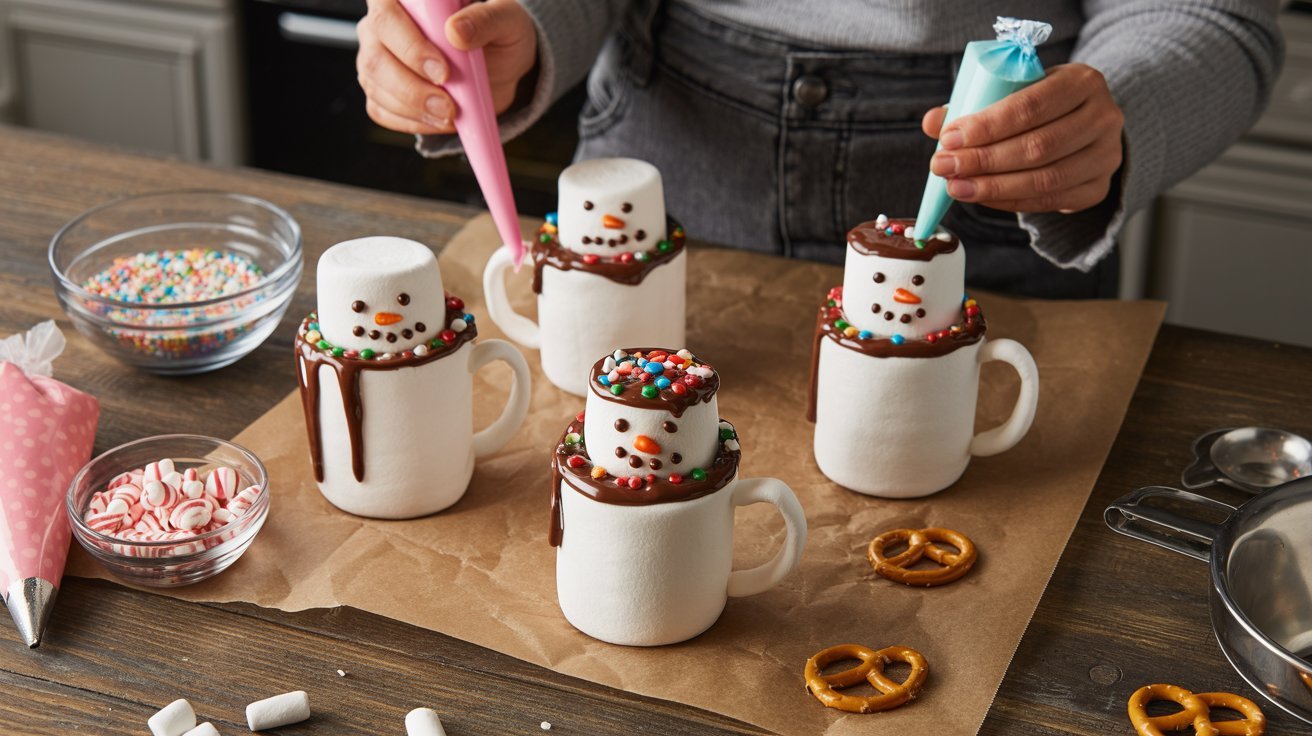
Start by lining a large tray or baking sheet with parchment paper so the marshmallows do not stick while decorating. Place the large marshmallows evenly across the tray with enough space between them for easy handling. Melt the milk chocolate chips with the coconut oil in a microwave-safe bowl using short 20-second intervals, stirring each time until smooth and glossy. I’ve noticed melting slowly helps prevent thick or grainy chocolate. Once smooth, allow the chocolate to cool slightly so it coats the marshmallows evenly without sliding off too quickly during the decorating process.
Step 2
Dip each marshmallow halfway into the melted milk chocolate, allowing the excess chocolate to drip back into the bowl before placing it onto the parchment paper. While the coating is still wet, gently press mini marshmallows, holiday sprinkles, or crushed peppermint onto the chocolate for texture and decoration. Insert two small pretzel stick pieces into the sides of selected marshmallows to resemble hot cocoa mug handles. In my experience, working with only a few marshmallows at a time keeps the chocolate from setting before the decorations are added, making the finished treats look much cleaner and more detailed.
Step 3
To create the snowmen hats, spread a small amount of melted chocolate onto the bottom of each mini peanut butter cup and gently press it onto the top of a marshmallow. Hold it in place for a few seconds so it sticks securely. The peanut butter cups instantly create a cute winter hat shape that makes these treats stand out on dessert trays. I’ve tried chilling the decorated marshmallows briefly after adding the hats, and it helps keep everything stable before moving on to the facial decorations and finishing details later in the recipe.
Step 4
Melt the white chocolate melts in a separate bowl until smooth and creamy. Use a spoon or piping bag to drizzle white chocolate across some marshmallows for a snowy effect. This layer adds extra sweetness and gives the treats a more festive winter appearance. While the white chocolate is still soft, sprinkle extra crushed peppermint or colorful sprinkles over the top. The contrast between the milk chocolate and white chocolate makes the decorations pop beautifully. In my experience, keeping the drizzle light creates a cleaner and more polished Pinterest-style presentation that photographs especially well.
Step 5
Use black decorating gel to carefully create small snowman eyes and smiles on the marshmallows with hats. Add tiny orange candy pearls or a small dot of orange icing to resemble carrot noses. These tiny details bring personality to each snowman and make the treats look playful and charming. I’ve noticed that using a toothpick for small details gives better control than squeezing directly from the decorating tube. Take your time during this step because simple facial expressions can completely change the look and character of the finished snowmen treats.
Step 6
Wrap thin strips of fruit leather or candy ribbons around the marshmallows to resemble scarves for the snowmen. Gently press them into the chocolate coating so they stay secure without sliding. For the cocoa mug designs, add extra mini marshmallows on top to resemble whipped cocoa toppings. This combination of textures makes the treats feel cozy and winter-inspired. The soft marshmallow centers, crunchy candy decorations, and creamy chocolate layers create a dessert that feels fun to eat as well as visually festive. In my experience, this is usually the step where kids get most excited helping in the kitchen.
Step 7
Allow all the Marshmallow Hot Cocoa Mugs & Snowmen Hats to rest at room temperature for about 20 minutes or chill them in the refrigerator for 10 minutes until the chocolate fully sets. Once firm, carefully transfer the treats onto a serving tray or holiday dessert platter. The finished marshmallows should look glossy, colorful, and neatly decorated. I’ve seen these work especially well for holiday cookie exchanges because they travel surprisingly well when stored in a single layer. The final texture stays soft inside while the chocolate shell gives each bite a satisfying sweetness and slight crunch.
Cooking Tips / Variations
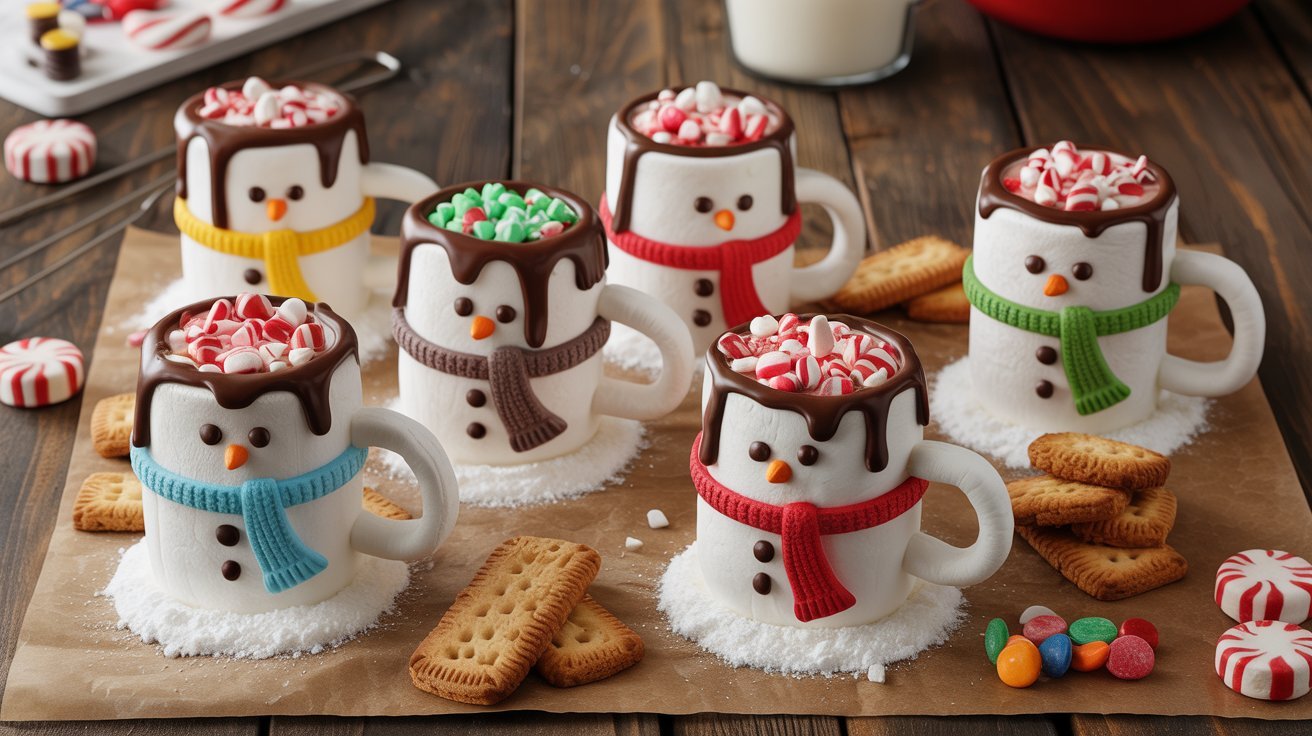
This recipe is wonderfully flexible, which makes it perfect for creative holiday baking sessions. If you prefer a richer flavor, try using dark chocolate instead of milk chocolate. White chocolate also works beautifully for a snowier winter look. I’ve tried adding crushed cookies, caramel drizzle, and even cinnamon sugar for extra flavor variations.
For a peppermint hot cocoa version, increase the crushed candy canes and add a tiny drop of peppermint extract to the melted chocolate. If serving these at parties, placing them in mini cupcake liners helps keep everything neat and easy to grab.
In my experience, chilled marshmallows are easier to dip neatly into chocolate because they hold their shape better during decorating and setting.
Serving or Storage Tips
These festive marshmallow treats are best served slightly chilled or at cool room temperature so the chocolate coating stays firm and smooth. Arrange them on holiday platters beside mugs of hot cocoa for a cozy dessert table everyone will remember. They also make adorable edible gifts when packed into decorative boxes or clear treat bags.
Store leftovers in an airtight container at room temperature for up to three days, or refrigerate them for about five days if your kitchen is warm. I’ve noticed refrigeration keeps the chocolate looking cleaner, especially during holiday gatherings with lots of movement and serving.
Avoid stacking the treats directly on top of each other because the decorations can smudge or break apart easily.
Conclusion
Marshmallow Hot Cocoa Mugs & Snowmen Hats are the perfect mix of festive, playful, and easy-to-make holiday sweetness. They bring together soft marshmallows, creamy chocolate, colorful decorations, and cozy winter charm in every bite. Whether you make them for a holiday party, family movie night, dessert tray, or edible gift, these treats instantly create a warm and cheerful atmosphere.
What makes this recipe truly special is how fun and beginner-friendly it feels while still looking impressive enough for Pinterest-worthy holiday photos. Save this recipe for your winter celebrations, share it with family and friends, and enjoy creating sweet holiday memories right in your own kitchen.
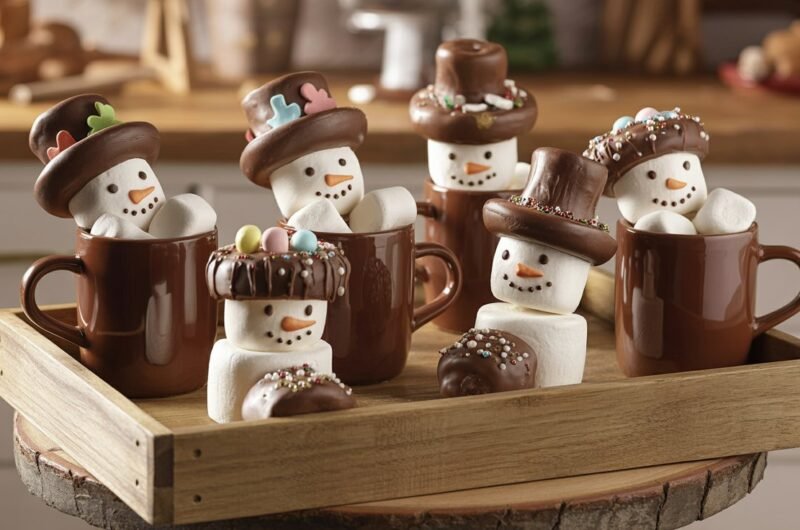
Marshmallow Hot Cocoa Mugs & Snowmen Hats
8
servings25
minutes10
minutes35
minutesThese Marshmallow Hot Cocoa Mugs & Snowmen Hats are adorable no-bake holiday treats made with fluffy marshmallows, melted chocolate, candy decorations, and festive winter charm. Perfect for holiday parties, dessert trays, edible gifts, and cozy family nights.
Ingredients
8 large marshmallows
1 cup milk chocolate chips
½ cup white chocolate melts
8 mini peanut butter cups
16 pretzel stick pieces
¼ cup mini marshmallows
2 tablespoons crushed peppermint candy
2 tablespoons holiday sprinkles
1 tablespoon coconut oil
Black decorating gel
Orange candy pearls or orange icing
Red candy ribbons or fruit leather strips
How to Make it
- Start by lining a large tray or baking sheet with parchment paper so the marshmallows do not stick while decorating. Place the large marshmallows evenly across the tray with enough space between them for easy handling. Melt the milk chocolate chips with the coconut oil in a microwave-safe bowl using short 20-second intervals, stirring each time until smooth and glossy. I’ve noticed melting slowly helps prevent thick or grainy chocolate. Once smooth, allow the chocolate to cool slightly so it coats the marshmallows evenly without sliding off too quickly during the decorating process.
- Dip each marshmallow halfway into the melted milk chocolate, allowing the excess chocolate to drip back into the bowl before placing it onto the parchment paper. While the coating is still wet, gently press mini marshmallows, holiday sprinkles, or crushed peppermint onto the chocolate for texture and decoration. Insert two small pretzel stick pieces into the sides of selected marshmallows to resemble hot cocoa mug handles. In my experience, working with only a few marshmallows at a time keeps the chocolate from setting before the decorations are added, making the finished treats look much cleaner and more detailed.
- To create the snowmen hats, spread a small amount of melted chocolate onto the bottom of each mini peanut butter cup and gently press it onto the top of a marshmallow. Hold it in place for a few seconds so it sticks securely. The peanut butter cups instantly create a cute winter hat shape that makes these treats stand out on dessert trays. I’ve tried chilling the decorated marshmallows briefly after adding the hats, and it helps keep everything stable before moving on to the facial decorations and finishing details later in the recipe.
- Melt the white chocolate melts in a separate bowl until smooth and creamy. Use a spoon or piping bag to drizzle white chocolate across some marshmallows for a snowy effect. This layer adds extra sweetness and gives the treats a more festive winter appearance. While the white chocolate is still soft, sprinkle extra crushed peppermint or colorful sprinkles over the top. The contrast between the milk chocolate and white chocolate makes the decorations pop beautifully. In my experience, keeping the drizzle light creates a cleaner and more polished Pinterest-style presentation that photographs especially well.
- Use black decorating gel to carefully create small snowman eyes and smiles on the marshmallows with hats. Add tiny orange candy pearls or a small dot of orange icing to resemble carrot noses. These tiny details bring personality to each snowman and make the treats look playful and charming. I’ve noticed that using a toothpick for small details gives better control than squeezing directly from the decorating tube. Take your time during this step because simple facial expressions can completely change the look and character of the finished snowmen treats.
- Wrap thin strips of fruit leather or candy ribbons around the marshmallows to resemble scarves for the snowmen. Gently press them into the chocolate coating so they stay secure without sliding. For the cocoa mug designs, add extra mini marshmallows on top to resemble whipped cocoa toppings. This combination of textures makes the treats feel cozy and winter-inspired. The soft marshmallow centers, crunchy candy decorations, and creamy chocolate layers create a dessert that feels fun to eat as well as visually festive. In my experience, this is usually the step where kids get most excited helping in the kitchen.
- Allow all the Marshmallow Hot Cocoa Mugs & Snowmen Hats to rest at room temperature for about 20 minutes or chill them in the refrigerator for 10 minutes until the chocolate fully sets. Once firm, carefully transfer the treats onto a serving tray or holiday dessert platter. The finished marshmallows should look glossy, colorful, and neatly decorated. I’ve seen these work especially well for holiday cookie exchanges because they travel surprisingly well when stored in a single layer. The final texture stays soft inside while the chocolate shell gives each bite a satisfying sweetness and slight crunch.
Notes
- Use high-quality melting chocolate for smoother dipping and easier decorating.
- Chill the marshmallows briefly before dipping for cleaner chocolate coverage.
- Work in small batches so the melted chocolate stays easy to handle.
- Store the treats in a cool place to prevent decorations from sliding.
- These treats are perfect for holiday parties, cookie exchanges, and winter dessert boards.
FAQ 1: Can I make Marshmallow Hot Cocoa Mugs & Snowmen Hats ahead of time?
Yes, these treats are great for making ahead during busy holiday weeks. You can prepare them one to two days in advance and store them in an airtight container. In my experience, they actually hold their shape better after resting for a few hours because the chocolate fully firms up and the decorations stay secure.
FAQ 2: What type of chocolate works best for this recipe?
Milk chocolate melts smoothly and creates a classic hot cocoa flavor, but dark chocolate or white chocolate also work well. I’ve noticed candy melts are especially beginner-friendly because they harden faster and make decorating easier without needing advanced baking skills.
FAQ 3: Can kids help make Marshmallow Hot Cocoa Mugs & Snowmen Hats?
Absolutely. This recipe is very kid-friendly because most of the fun comes from decorating rather than baking. Children can add sprinkles, scarves, candy eyes, and mini marshmallows while adults handle the melted chocolate. It’s a fun holiday kitchen activity for families.
FAQ 4: How do I keep the marshmallows from getting sticky?
The chocolate coating helps protect the marshmallows from becoming sticky, but storing them in a cool, dry place is important. Avoid humid kitchens whenever possible. I’ve found parchment paper between layers also helps prevent sticking during storage or transport.
FAQ 5: Can I use different decorations for the snowmen hats and mugs?
Definitely. This recipe is very customizable. You can use mini cookies, chocolate wafers, crushed candies, colored icing, or festive sprinkles to create different holiday styles. In my experience, mixing textures and colors makes the dessert tray look even more eye-catching and festive.