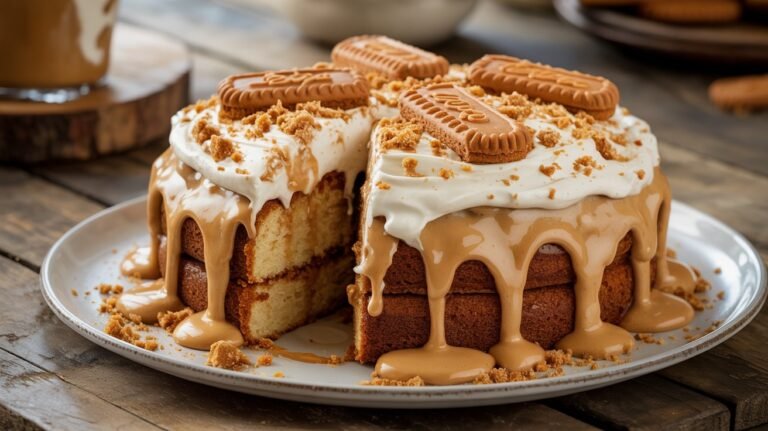
Little Debbie Petit Fours are the kind of nostalgic dessert that instantly makes a dessert table feel extra special. These tiny frosted cakes are soft, sweet, creamy, and beautifully layered, making them perfect for holidays, birthdays, baby showers, or weekend baking projects. The smooth icing and delicate cake texture create that classic bakery-style look people love saving on Pinterest.
What makes this recipe special is how approachable it is for home bakers. You do not need advanced decorating skills to create elegant little cakes that look impressive. In my experience, the simple poured icing technique gives them that signature petit four finish without stress. I’ve noticed these treats disappear quickly anytime they’re served because they feel both nostalgic and fancy at the same time.
The flavor is rich but light enough to enjoy with coffee, tea, or even as a sweet afternoon snack. Each bite has soft vanilla cake, creamy filling, and a sweet coating that melts beautifully in your mouth.
Why You’ll Love This Recipe
This recipe is perfect for anyone who loves bakery-style desserts but wants something simple enough to make at home. The petit fours look elegant and impressive, yet the steps are beginner friendly and easy to follow. The soft cake combined with creamy filling creates a texture that feels rich without being overly heavy.
One of the best things about these Little Debbie Petit Fours is how customizable they are. You can decorate them with sprinkles, colored drizzle, coconut, or even festive toppings for holidays. I’ve tried this recipe for family gatherings, and people always think they came from a specialty bakery.
They are also ideal for making ahead because the icing sets beautifully in the refrigerator. The chilled texture actually makes the layers taste even more delicious. If you enjoy nostalgic desserts with a homemade touch, this recipe delivers both comfort and presentation in every bite.
Ingredients
- 2 cups vanilla cake flour
- 1 teaspoon baking powder
- ½ teaspoon salt
- ¾ cup unsalted butter, softened
- 1½ cups granulated sugar
- 4 large eggs
- 1 tablespoon vanilla extract
- ¾ cup whole milk
- 1 cup vanilla frosting or buttercream
- ½ cup raspberry or strawberry jam
- 4 cups powdered sugar
- ¼ cup heavy cream
The ingredients for these Little Debbie Petit Fours are simple and easy to find, which makes this recipe approachable for beginner bakers. The cake flour helps create a softer texture that feels delicate and light. In my experience, using a small layer of jam between the cake adds extra moisture and a subtle fruity flavor that balances the sweetness beautifully. The poured icing is what gives petit fours their signature smooth finish, so sift the powdered sugar carefully for the best results.
How to Make It
Step 1
Start by preheating your oven to 350°F and lightly greasing a rectangular baking pan. In a medium bowl, whisk together the cake flour, baking powder, and salt until evenly combined. In another large mixing bowl, beat the softened butter and sugar until pale and fluffy. This step matters because it creates a lighter cake texture. Add the eggs one at a time, mixing slowly after each addition. Stir in the vanilla extract. I’ve noticed taking your time during this stage helps create a smoother batter that bakes more evenly and gives the petit fours a softer crumb.
Step 2
Slowly add the dry ingredients into the butter mixture while alternating with the milk. Mix gently until the batter becomes smooth and creamy without overmixing it. Overworked batter can make the cake dense instead of soft and delicate. Pour the batter into the prepared pan and spread it evenly using a spatula. Bake for about 22–26 minutes or until a toothpick inserted into the center comes out clean. The top should look lightly golden. In my experience, allowing the cake to cool completely before slicing prevents cracking and makes assembling the petit fours much easier later.
Step 3
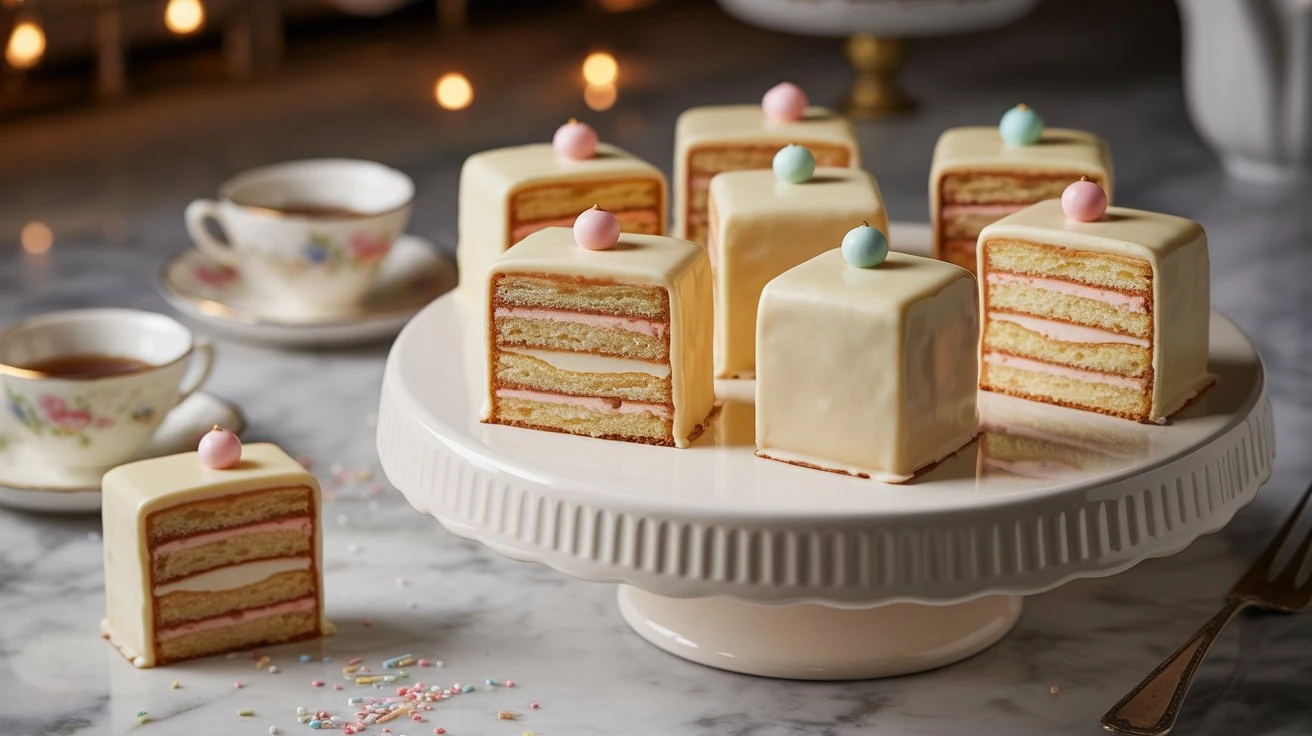
Once the cake has cooled, carefully trim the edges for clean layers. Slice the cake horizontally into two thin layers using a serrated knife. Spread a thin layer of vanilla frosting over the bottom layer, then gently spread the jam on top. Place the second cake layer over the filling and press lightly. This creates the classic layered petit four texture. I’ve tried chilling the layered cake for about 30 minutes before cutting, and it makes the squares cleaner and easier to handle without crumbling around the edges.
Step 4
After chilling, cut the cake into small even squares or rectangles. Arrange the pieces on a wire rack placed over parchment paper. This setup helps catch extra icing and keeps cleanup simple. The petit fours should look neat and uniform because presentation is part of their charm. If the cake starts feeling too soft while cutting, place it back into the refrigerator for a few minutes. I’ve noticed colder cake layers hold their shape better and make the icing process much smoother, especially for beginners trying petit fours for the first time.
Step 5
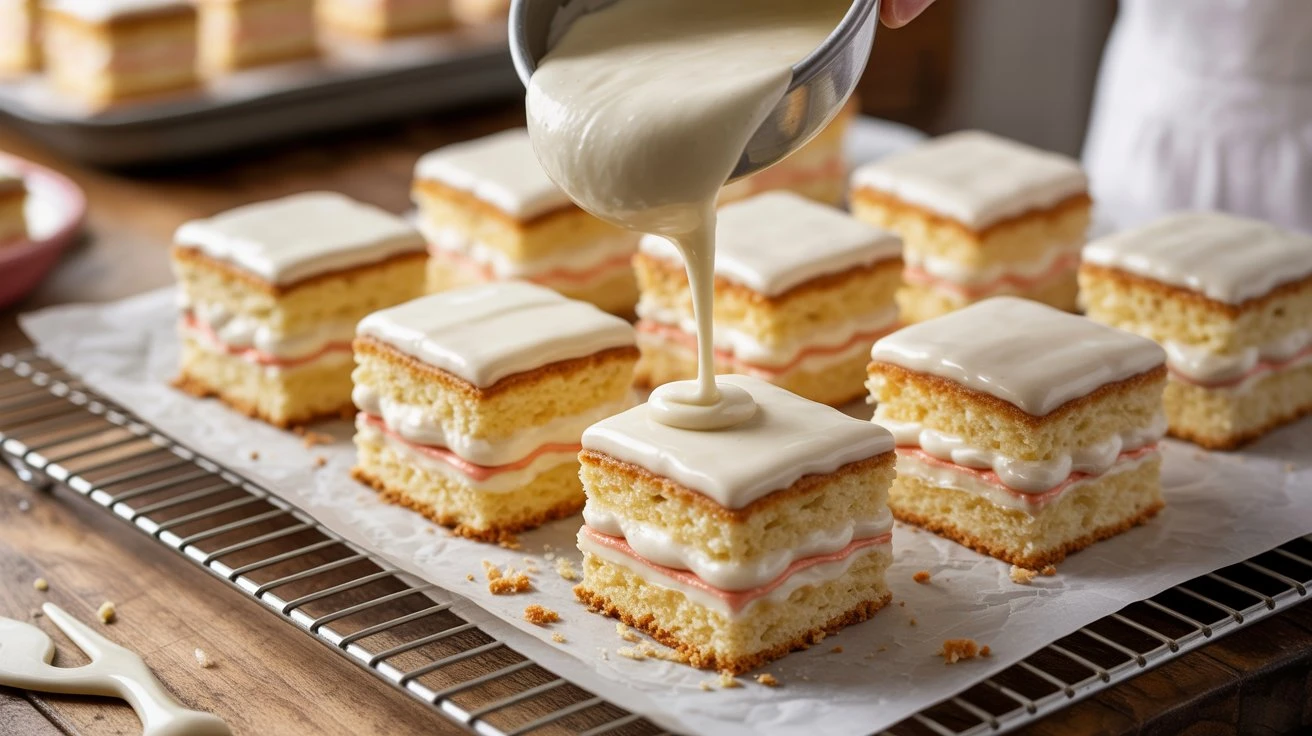
To prepare the icing, whisk together the powdered sugar and heavy cream until smooth and pourable. The texture should be thick enough to coat the cakes but thin enough to flow evenly down the sides. If needed, add a tiny splash of cream to loosen it slightly. Pour the icing slowly over each cake square, making sure every side gets coated. The glossy finish is what gives Little Debbie Petit Fours their signature bakery appearance. Warm icing usually spreads more smoothly, so avoid letting it sit too long before pouring.
Step 6
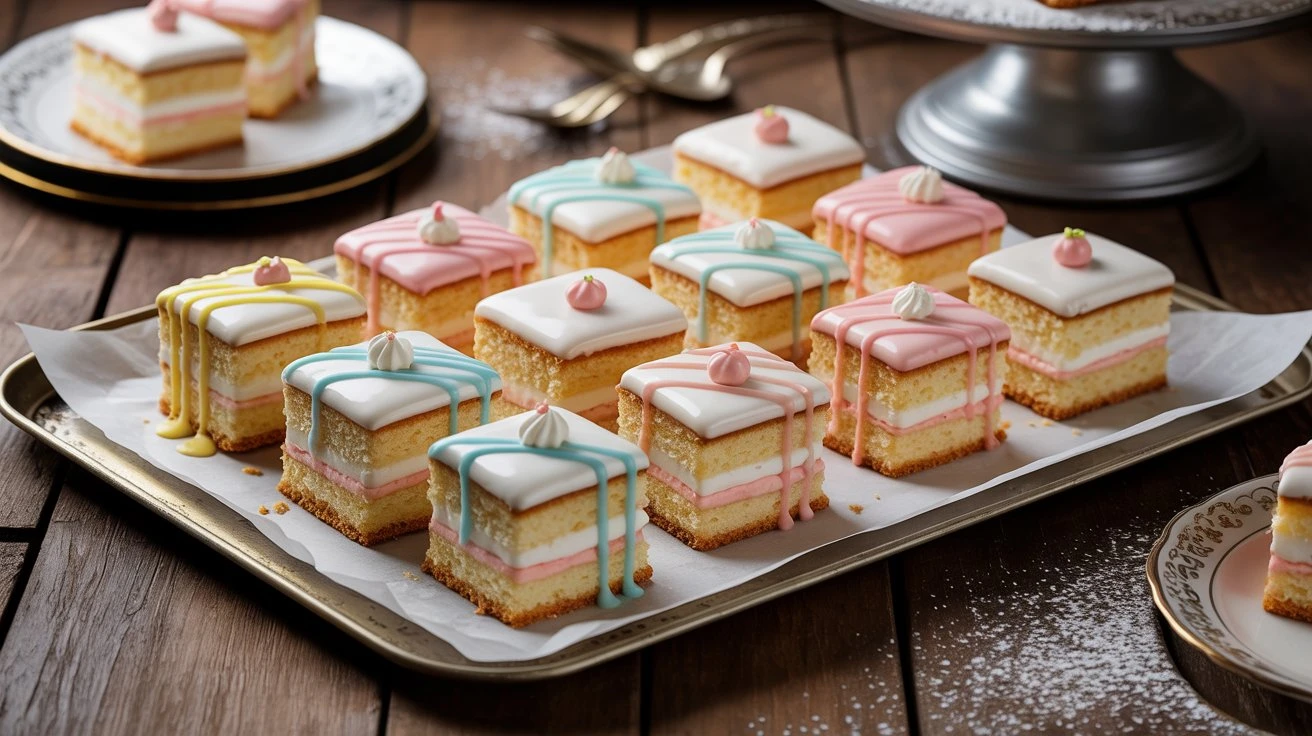
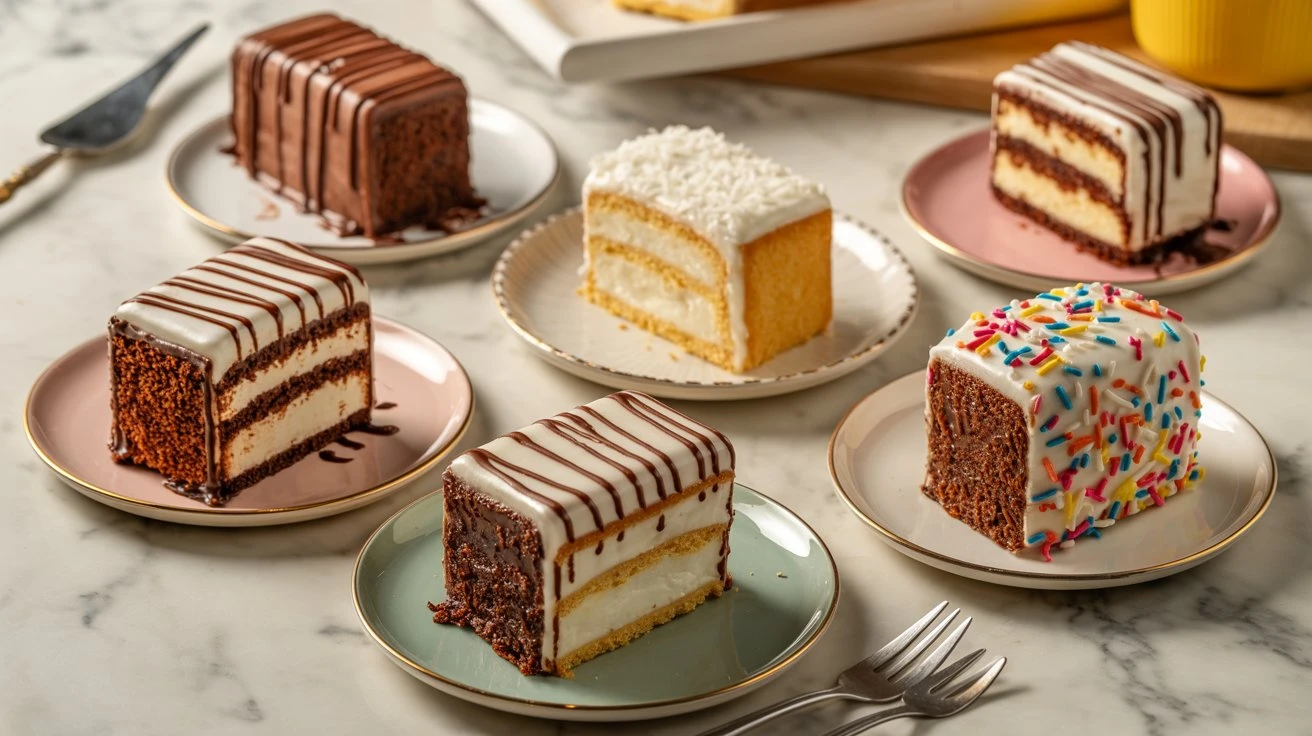
Allow the icing to set for several minutes before adding decorations. You can drizzle melted chocolate, add sprinkles, shredded coconut, or pastel icing lines for a bakery-inspired finish. This is the fun part where you can customize the petit fours for birthdays, holidays, or parties. In my experience, simple decorations often look the most elegant because the glossy icing already makes the cakes visually beautiful. Let the decorated cakes rest until the icing fully firms up so they stay neat and easy to serve later.
Step 7
Transfer the finished petit fours to the refrigerator for at least 20 minutes before serving. Chilling helps the icing set completely and gives the cakes their signature soft but firm texture. The flavors also blend together better after resting. I’ve noticed these little cakes taste even richer the next day because the filling slightly softens the cake layers overnight. Serve them chilled or slightly cool with coffee, tea, or milk for a nostalgic bakery-style dessert experience that feels both homemade and elegant.
Cooking Tips / Variations
One helpful tip is to chill the layered cake before cutting because colder cake creates cleaner petit four shapes. If the icing feels too thick, add cream one teaspoon at a time until it pours smoothly. In my experience, rushing the icing stage can lead to uneven coating, so work slowly for the prettiest finish.
You can easily customize these Little Debbie Petit Fours with different flavors. Swap the jam for lemon curd, chocolate spread, or strawberry preserves for a fun twist. Almond extract also adds a bakery-style flavor that pairs beautifully with vanilla cake.
For a holiday version, use colored icing drizzle or festive sprinkles. I’ve tried adding white chocolate shavings on top, and they create a beautiful bakery-style presentation that looks amazing in Pinterest photos.
Serving or Storage Tips
These petit fours are best served slightly chilled because the icing stays smooth and the cake layers hold together beautifully. Arrange them on a cake stand or decorative dessert tray for parties, showers, or holiday gatherings. Their pastel colors and glossy finish make them especially eye-catching for Pinterest-worthy dessert tables.
Store leftover Little Debbie Petit Fours in an airtight container in the refrigerator for up to five days. Place parchment paper between layers to prevent sticking. I’ve noticed the flavor actually improves after a day because the filling softens the cake perfectly.
If you want to make them ahead, freeze the undecorated cake squares before icing. Thaw them overnight in the refrigerator before finishing with glaze and decorations for the freshest texture.
Conclusion
Little Debbie Petit Fours are the perfect combination of nostalgic flavor and elegant presentation. The soft cake layers, creamy filling, and glossy icing create a dessert that feels bakery-worthy while still being approachable for home bakers. Whether you make them for holidays, birthdays, or afternoon coffee breaks, these tiny cakes always feel extra special.
What makes this recipe worth trying is how customizable and beginner friendly it is. You can decorate them in countless ways and easily make them ahead for gatherings. Save these Little Debbie Petit Fours on Pinterest, share them with friends or family, and enjoy creating a homemade dessert that looks just as beautiful as it tastes. Happy baking!

Little Debbie Petit Fours
12 petit fours
servings30
minutes25
minutes55
minutesIngredients
2 cups vanilla cake flour
1 teaspoon baking powder
½ teaspoon salt
¾ cup unsalted butter, softened
1½ cups granulated sugar
4 large eggs
1 tablespoon vanilla extract
¾ cup whole milk
1 cup vanilla frosting or buttercream
½ cup raspberry or strawberry jam
4 cups powdered sugar
¼ cup heavy cream
How to Make it
- Start by preheating your oven to 350°F and lightly greasing a rectangular baking pan. In a medium bowl, whisk together the cake flour, baking powder, and salt until evenly combined. In another large mixing bowl, beat the softened butter and sugar until pale and fluffy. This step matters because it creates a lighter cake texture. Add the eggs one at a time, mixing slowly after each addition. Stir in the vanilla extract. I’ve noticed taking your time during this stage helps create a smoother batter that bakes more evenly and gives the petit fours a softer crumb.
- Slowly add the dry ingredients into the butter mixture while alternating with the milk. Mix gently until the batter becomes smooth and creamy without overmixing it. Overworked batter can make the cake dense instead of soft and delicate. Pour the batter into the prepared pan and spread it evenly using a spatula. Bake for about 22–26 minutes or until a toothpick inserted into the center comes out clean. The top should look lightly golden. In my experience, allowing the cake to cool completely before slicing prevents cracking and makes assembling the petit fours much easier later.
- Once the cake has cooled, carefully trim the edges for clean layers. Slice the cake horizontally into two thin layers using a serrated knife. Spread a thin layer of vanilla frosting over the bottom layer, then gently spread the jam on top. Place the second cake layer over the filling and press lightly. This creates the classic layered petit four texture. I’ve tried chilling the layered cake for about 30 minutes before cutting, and it makes the squares cleaner and easier to handle without crumbling around the edges.
- After chilling, cut the cake into small even squares or rectangles. Arrange the pieces on a wire rack placed over parchment paper. This setup helps catch extra icing and keeps cleanup simple. The petit fours should look neat and uniform because presentation is part of their charm. If the cake starts feeling too soft while cutting, place it back into the refrigerator for a few minutes. I’ve noticed colder cake layers hold their shape better and make the icing process much smoother, especially for beginners trying petit fours for the first time.
- To prepare the icing, whisk together the powdered sugar and heavy cream until smooth and pourable. The texture should be thick enough to coat the cakes but thin enough to flow evenly down the sides. If needed, add a tiny splash of cream to loosen it slightly. Pour the icing slowly over each cake square, making sure every side gets coated. The glossy finish is what gives Little Debbie Petit Fours their signature bakery appearance. Warm icing usually spreads more smoothly, so avoid letting it sit too long before pouring.
- Allow the icing to set for several minutes before adding decorations. You can drizzle melted chocolate, add sprinkles, shredded coconut, or pastel icing lines for a bakery-inspired finish. This is the fun part where you can customize the petit fours for birthdays, holidays, or parties. In my experience, simple decorations often look the most elegant because the glossy icing already makes the cakes visually beautiful. Let the decorated cakes rest until the icing fully firms up so they stay neat and easy to serve later.
- Transfer the finished petit fours to the refrigerator for at least 20 minutes before serving. Chilling helps the icing set completely and gives the cakes their signature soft but firm texture. The flavors also blend together better after resting. I’ve noticed these little cakes taste even richer the next day because the filling slightly softens the cake layers overnight. Serve them chilled or slightly cool with coffee, tea, or milk for a nostalgic bakery-style dessert experience that feels both homemade and elegant.
FAQ
FAQ 1: Can I make Little Debbie Petit Fours ahead of time?
Yes, these petit fours are excellent for making ahead. In fact, I’ve noticed the texture becomes even softer and more flavorful after resting overnight in the refrigerator. You can prepare the cake layers one day ahead and decorate them later. Store them in an airtight container to keep the icing fresh and smooth.
FAQ 2: What is the best filling for Little Debbie Petit Fours?
Vanilla buttercream and fruit jam are classic choices because they create the soft, sweet texture petit fours are known for. Raspberry, strawberry, or apricot jam work especially well. If you want a richer flavor, you can also use chocolate ganache or cream cheese frosting between the layers.
FAQ 3: Why is my petit four icing too thick?
If the icing feels too thick, it usually needs a little more cream. Add it slowly, about one teaspoon at a time, until the glaze becomes smooth and pourable. In my experience, slightly warm icing spreads more evenly and creates the glossy bakery-style coating people love on Little Debbie Petit Fours.
FAQ 4: Can I freeze Little Debbie Petit Fours?
Yes, these cakes freeze surprisingly well. Freeze the cut cake squares before icing for the best results. Wrap them carefully and store them in an airtight container for up to two months. When ready to use, thaw them in the refrigerator overnight before adding the glaze and decorations.
FAQ 5: How do I keep petit fours from crumbling while cutting?
Chilling the cake before slicing makes a huge difference. Cold cake layers are firmer and easier to cut into clean squares. Use a sharp serrated knife and wipe it clean between cuts for neat edges. I’ve tried freezing the cake briefly before cutting, and it works especially well for beginners.