There’s something irresistible about a warm bowl of cheesy dip sitting in the center of the table. Chuy’s Queso Recipe brings that restaurant-style experience right into your kitchen with surprisingly simple ingredients and a rich, creamy texture that keeps everyone coming back for more.
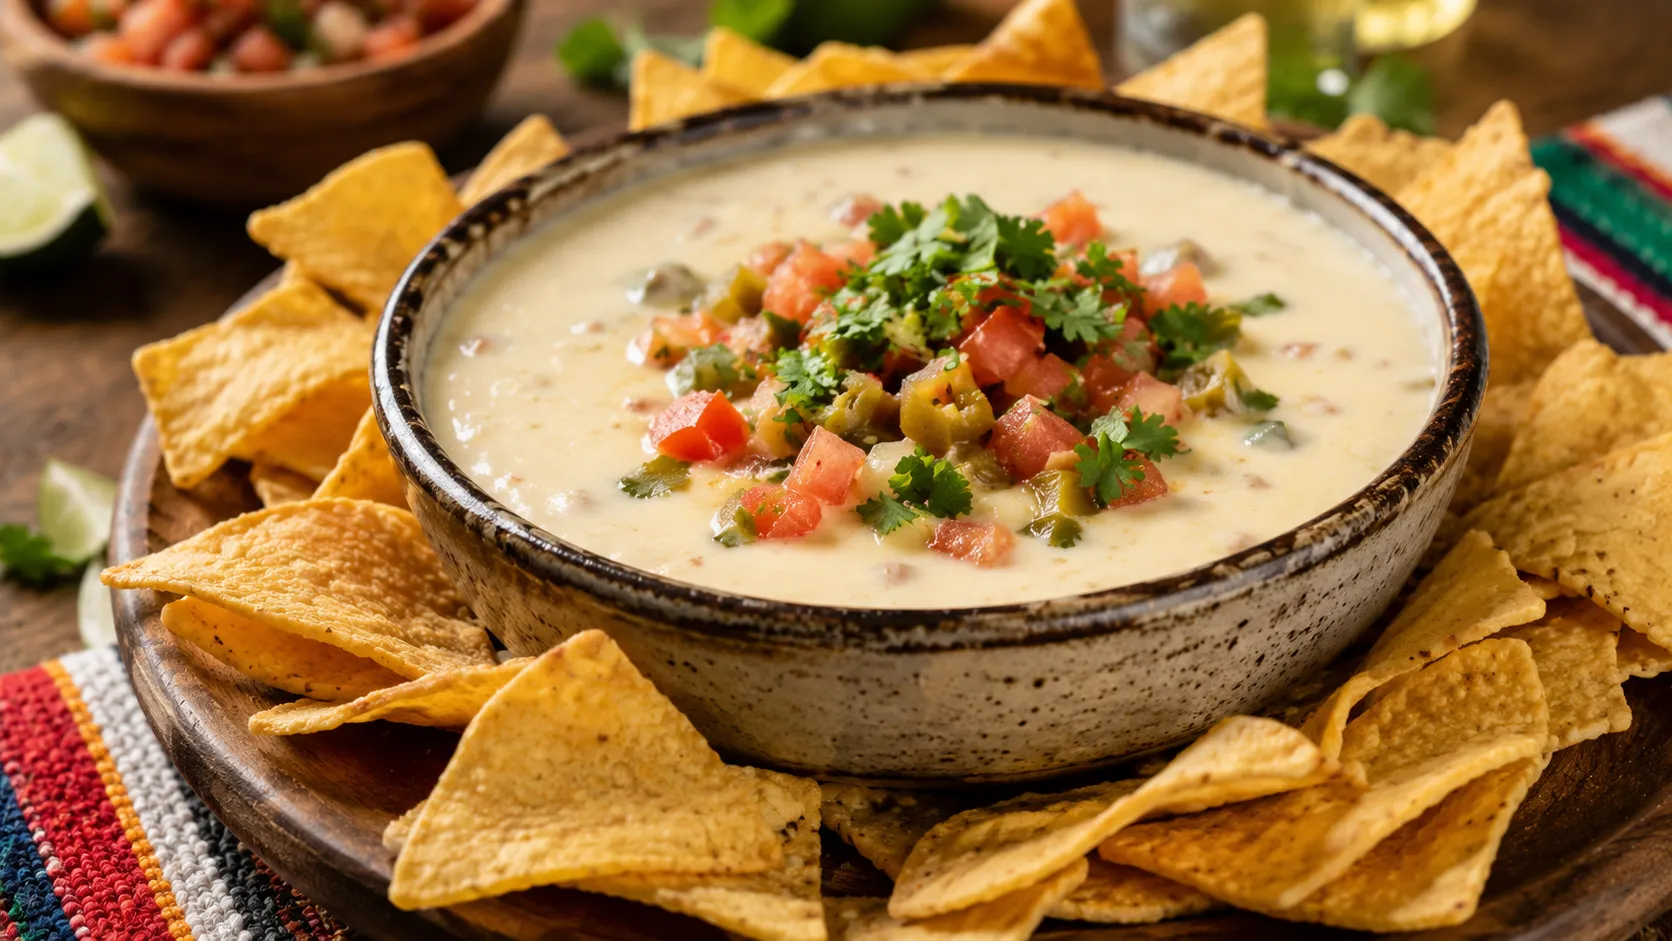
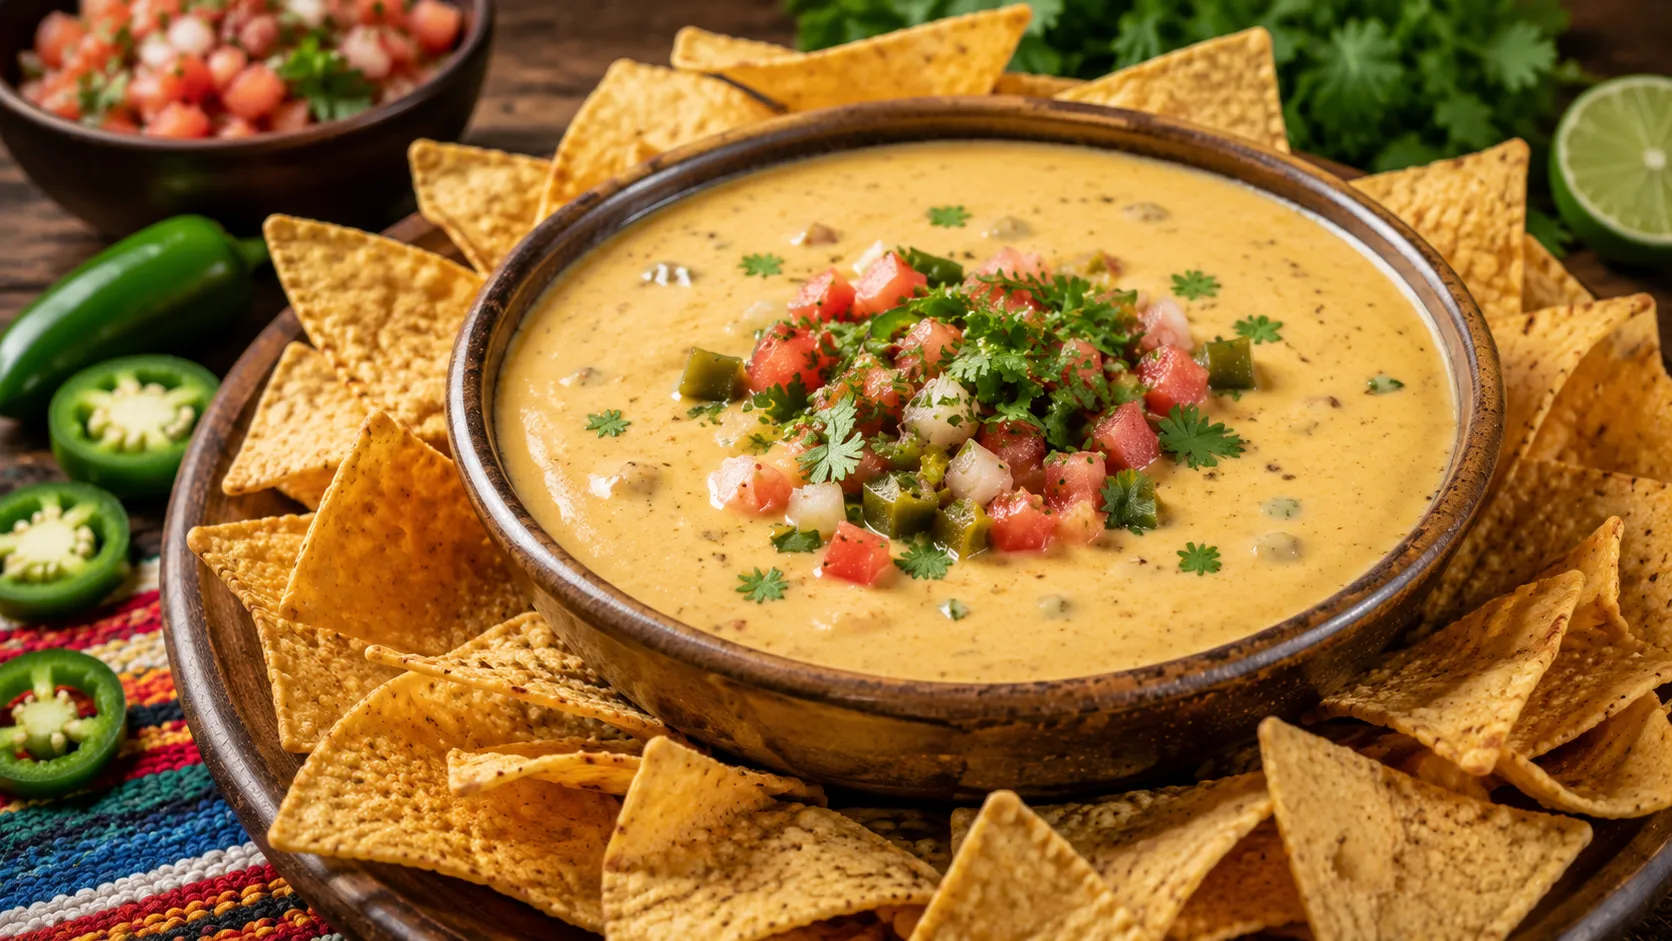
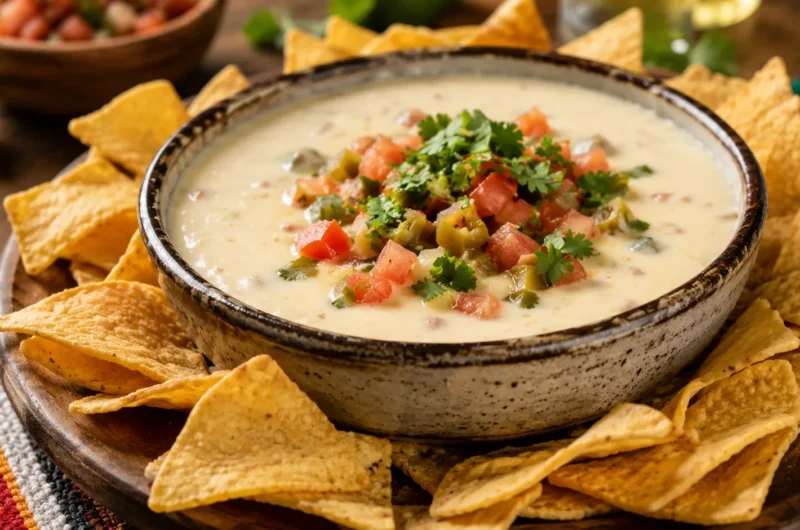
This famous queso is known for its smooth consistency, mild spice, and flavorful blend of cheese and green chiles. It pairs perfectly with tortilla chips, tacos, burritos, and even fresh vegetables. What makes it special is the balance of creamy cheese and savory seasonings that create a dip that feels both comforting and indulgent.
In my experience, homemade queso often tastes fresher and more flavorful than store-bought versions. This recipe is beginner-friendly, quick to prepare, and perfect for parties, game days, or casual family gatherings.
If you love cheesy appetizers that disappear quickly, this recipe deserves a spot in your collection.
Why You’ll Love This Recipe
If you love cheesy appetizers that disappear quickly, this recipe deserves a spot in your collection. The creamy texture makes every bite satisfying while the green chiles add just enough flavor without overwhelming heat.
This recipe comes together in minutes using simple ingredients that are easy to find. It is ideal for busy weeknights, weekend gatherings, and holiday parties.
I’ve noticed that guests often assume homemade queso is difficult to make, but this version proves otherwise. It is smooth, rich, and incredibly versatile. Whether served with chips, drizzled over nachos, or spooned onto tacos, it delivers restaurant-style flavor with very little effort.
Chuy’s Queso Recipe brings that restaurant style dip experience right into your kitchen with surprisingly simple ingredients and a rich, creamy texture that keeps everyone coming back for more.
Ingredients
- 16 ounces white American cheese, cubed
- 1 cup Monterey Jack cheese, shredded
- 1 cup evaporated milk
- 1 can diced green chiles (4 ounces)
- ½ cup diced tomatoes
- 1 small jalapeño, finely chopped
- ½ teaspoon garlic powder
- ¼ teaspoon ground cumin
- ¼ teaspoon onion powder
- 2 tablespoons fresh cilantro, chopped
- Salt to taste
How to Make It

Step 1
Place a medium saucepan over low heat and add the evaporated milk. Allow the milk to warm gently for several minutes without bringing it to a boil. Starting with warm milk helps the cheese melt evenly and reduces the chance of a grainy texture later. I’ve found that rushing this step often causes cheese sauces to separate. Stir occasionally while the milk heats, creating a smooth base for the queso. Once the milk feels warm and small bubbles begin forming around the edges, you are ready to move on to the next step of building the creamy dip.
Step 2
Gradually add the cubed white American cheese to the warm milk. Add only a handful at a time while stirring continuously with a wooden spoon or silicone spatula. Allow each addition to melt completely before adding more cheese. This slow process helps create the signature smooth texture that makes queso so enjoyable. Continue stirring gently and consistently. The mixture will begin looking glossy and creamy as the cheese melts. Avoid turning up the heat because high temperatures can cause the cheese to become oily or develop an uneven consistency.
Step 3
Once the American cheese has melted completely, add the shredded Monterey Jack cheese. Stir continuously as the second cheese melts into the mixture. This combination creates extra richness while adding a subtle depth of flavor. The queso should now look thick, silky, and pourable. If it appears too thick, add a small splash of milk and continue stirring. In my experience, keeping the heat low throughout the process is the secret to achieving a restaurant-quality texture. The mixture should remain smooth without any lumps or signs of separation.
Step 4
Add the diced green chiles, stirring thoroughly so they are evenly distributed throughout the queso. The green chiles contribute a mild heat and savory flavor that helps define this popular dip. Mix carefully to ensure every spoonful contains a balanced amount of flavor. As the chiles warm through, they release their aroma into the cheese mixture. Let everything cook together for about two minutes while stirring occasionally. This short cooking time allows the ingredients to blend without affecting the smooth consistency of the melted cheese base.
Step 5
Add the diced tomatoes and finely chopped jalapeño to the saucepan. Stir gently until the vegetables are evenly mixed throughout the queso. The tomatoes add freshness and color while the jalapeño provides a small kick of heat. If you prefer a milder version, you can reduce the amount of jalapeño or omit it entirely. Continue cooking over low heat for several minutes. The mixture should remain creamy and smooth while the vegetables soften slightly. This step helps create the balanced flavor profile that makes the dip so addictive.
Step 6
Sprinkle in the garlic powder, onion powder, cumin, and a small amount of salt. Stir carefully to distribute the seasonings throughout the queso. These spices add subtle depth without overpowering the cheese. Taste the mixture and adjust seasoning if needed. I’ve tried adding extra cumin before, but a light touch works best because it allows the cheese flavor to remain the star of the recipe. Continue stirring for another minute while the seasonings blend into the warm dip, creating a rich and flavorful finish.
Step 7
Remove the saucepan from the heat and stir in the chopped fresh cilantro. The residual warmth will soften the herbs and release their fresh aroma without dulling their flavor. Allow the queso to rest for two to three minutes before serving. This brief resting period helps the flavors settle and gives the dip its ideal serving consistency. If the queso thickens slightly during this time, simply stir it before serving. The finished dip should be creamy, smooth, and easy to scoop with chips.
This famous queso is known for its smooth consistency, mild spice, and flavorful blend of creamy cheese and green chiles.
Cooking Tips / Variations
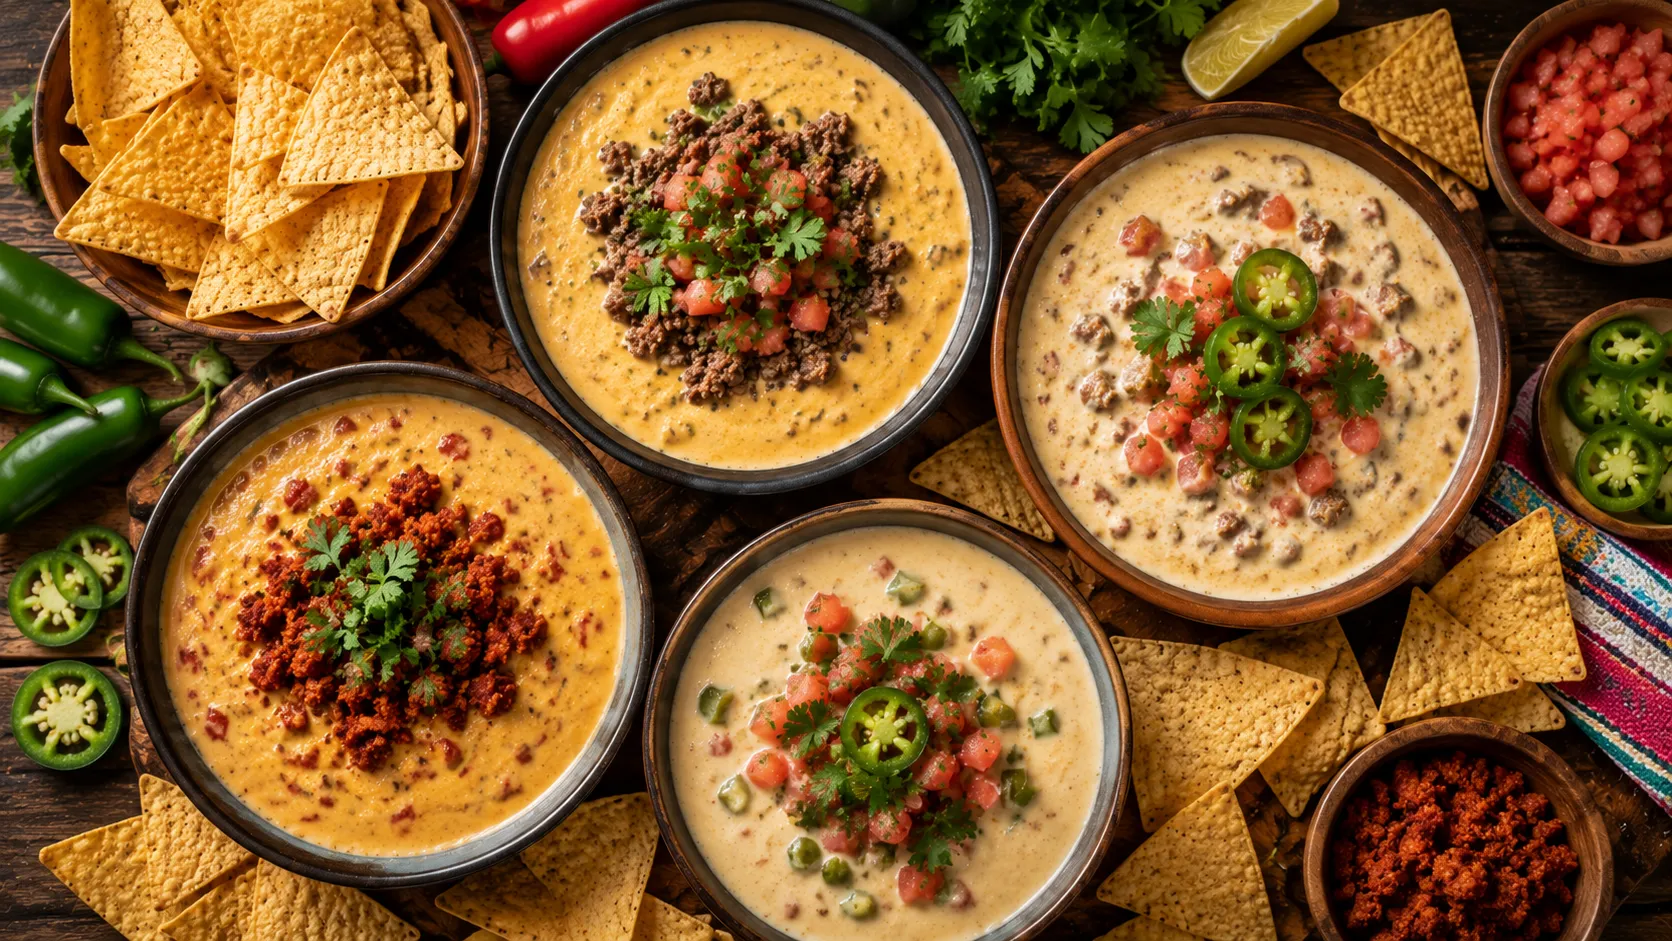
For extra flavor, add cooked chorizo, seasoned ground beef, or black beans. These additions turn the dip into a more filling appetizer.
If you enjoy spicy food, increase the jalapeños or add a pinch of cayenne pepper. For a milder version, use only green chiles.
I’ve noticed that freshly shredded cheese melts more smoothly than pre-shredded varieties. If you want a thinner consistency, stir in a few tablespoons of warm milk.
You can also top the finished queso with diced tomatoes, cilantro, sliced jalapeños, or green onions for a colorful presentation that looks beautiful on Pinterest and party tables.
Tortilla chips are the classic choice, but this queso also pairs well with tacos, nachos, burritos, soft pretzels, roasted vegetables, and even baked potatoes.
Serving or Storage Tips
Serve the queso immediately while it is warm and silky. It pairs wonderfully with tortilla chips, nachos, tacos, burritos, quesadillas, and roasted vegetables.
Store leftovers in an airtight container in the refrigerator for up to 4 days. When reheating, use low heat and stir frequently. Add a splash of milk if needed to restore the creamy texture.
In my experience, reheating slowly prevents the cheese from separating. For parties, consider keeping the queso warm in a small slow cooker so guests can enjoy it throughout the event without losing that smooth restaurant-style consistency.
For parties, consider keeping the queso warm in a small slow cooker so guests can enjoy it throughout the event without losing that smooth restaurant-style consistency.
Conclusion
Chuy’s Queso Recipe is the perfect combination of creamy cheese, savory seasonings, and mild green chile flavor. It is easy enough for beginners yet delicious enough to impress guests at any gathering. Whether you are planning game day snacks, family movie nights, or casual entertaining, this queso delivers crowd-pleasing results every time.
Save this recipe on Pinterest for later inspiration, give it a try in your own kitchen, and share it with friends and family who love cheesy appetizers. One warm bowl of this homemade queso can instantly make any gathering feel more special and memorable.
For extra flavor, add cooked chorizo, seasoned ground beef, or black beans.
Chuy’s Queso Recipe
8
servings10
minutes15
minutes20
minutesThis creamy Chuy’s Queso Recipe combines melted white cheese, green chiles, tomatoes, and simple seasonings to create a smooth, flavorful dip perfect for parties, game days, and family gatherings.
Ingredients
16 ounces white American cheese, cubed
1 cup Monterey Jack cheese, shredded
1 cup evaporated milk
1 can diced green chiles (4 ounces)
½ cup diced tomatoes
1 small jalapeño, finely chopped
½ teaspoon garlic powder
¼ teaspoon ground cumin
¼ teaspoon onion powder
2 tablespoons fresh cilantro, chopped
Salt to taste
How to Make it
- Place a medium saucepan over low heat and add the evaporated milk. Allow the milk to warm gently for several minutes without bringing it to a boil. Starting with warm milk helps the cheese melt evenly and reduces the chance of a grainy texture later. I’ve found that rushing this step often causes cheese sauces to separate. Stir occasionally while the milk heats, creating a smooth base for the queso. Once the milk feels warm and small bubbles begin forming around the edges, you are ready to move on to the next step of building the creamy dip.
- Gradually add the cubed white American cheese to the warm milk. Add only a handful at a time while stirring continuously with a wooden spoon or silicone spatula. Allow each addition to melt completely before adding more cheese. This slow process helps create the signature smooth texture that makes queso so enjoyable. Continue stirring gently and consistently. The mixture will begin looking glossy and creamy as the cheese melts. Avoid turning up the heat because high temperatures can cause the cheese to become oily or develop an uneven consistency.
- Once the American cheese has melted completely, add the shredded Monterey Jack cheese. Stir continuously as the second cheese melts into the mixture. This combination creates extra richness while adding a subtle depth of flavor. The queso should now look thick, silky, and pourable. If it appears too thick, add a small splash of milk and continue stirring. In my experience, keeping the heat low throughout the process is the secret to achieving a restaurant-quality texture. The mixture should remain smooth without any lumps or signs of separation.
- Add the diced green chiles, stirring thoroughly so they are evenly distributed throughout the queso. The green chiles contribute a mild heat and savory flavor that helps define this popular dip. Mix carefully to ensure every spoonful contains a balanced amount of flavor. As the chiles warm through, they release their aroma into the cheese mixture. Let everything cook together for about two minutes while stirring occasionally. This short cooking time allows the ingredients to blend without affecting the smooth consistency of the melted cheese base.
- Add the diced tomatoes and finely chopped jalapeño to the saucepan. Stir gently until the vegetables are evenly mixed throughout the queso. The tomatoes add freshness and color while the jalapeño provides a small kick of heat. If you prefer a milder version, you can reduce the amount of jalapeño or omit it entirely. Continue cooking over low heat for several minutes. The mixture should remain creamy and smooth while the vegetables soften slightly. This step helps create the balanced flavor profile that makes the dip so addictive.
- Sprinkle in the garlic powder, onion powder, cumin, and a small amount of salt. Stir carefully to distribute the seasonings throughout the queso. These spices add subtle depth without overpowering the cheese. Taste the mixture and adjust seasoning if needed. I’ve tried adding extra cumin before, but a light touch works best because it allows the cheese flavor to remain the star of the recipe. Continue stirring for another minute while the seasonings blend into the warm dip, creating a rich and flavorful finish.
- Remove the saucepan from the heat and stir in the chopped fresh cilantro. The residual warmth will soften the herbs and release their fresh aroma without dulling their flavor. Allow the queso to rest for two to three minutes before serving. This brief resting period helps the flavors settle and gives the dip its ideal serving consistency. If the queso thickens slightly during this time, simply stir it before serving. The finished dip should be creamy, smooth, and easy to scoop with chips.
Notes
- Use low heat throughout cooking for the smoothest texture.
- Add milk gradually if the queso becomes too thick.
- Fresh cilantro adds brightness and color just before serving.
- Store leftovers refrigerated and reheat gently.
- Customize the spice level by adjusting the jalapeños.
Whether served with chips, parmesan crusted spinach dip drizzled over nachos, or spooned onto tacos, it delivers restaurant-style flavor with very little effort.
FAQ 1: What cheese is best for Chuy’s Queso Recipe?
White American cheese is the key ingredient because it melts smoothly and creates the signature creamy texture. Monterey Jack cheese adds extra richness and flavor. Together, they produce a queso that closely resembles the restaurant favorite.
FAQ 2: Can I make Chuy’s Queso Recipe ahead of time?
Yes. You can prepare the queso a day in advance and store it in the refrigerator. Reheat gently over low heat while stirring often. Add a little milk if the dip becomes too thick during storage.
FAQ 3: How do I keep queso from becoming grainy?
Use low heat and add the cheese gradually. Avoid boiling the mixture because excessive heat can cause the cheese to separate. Stir continuously while melting the cheese for the smoothest texture.
FAQ 4: Can I make this queso spicier?
Absolutely. Add extra jalapeños, diced serrano peppers, or a pinch of cayenne pepper. These additions increase the heat while maintaining the creamy texture of the Chuy’s Queso Recipe.
FAQ 5: What can I serve with Chuy’s Queso Recipe?
Tortilla chips are the classic choice, but this queso also pairs well with tacos, nachos, burritos, soft pretzels, roasted vegetables, and even baked potatoes. Its versatility makes it perfect for many meals and snacks.


One Comment