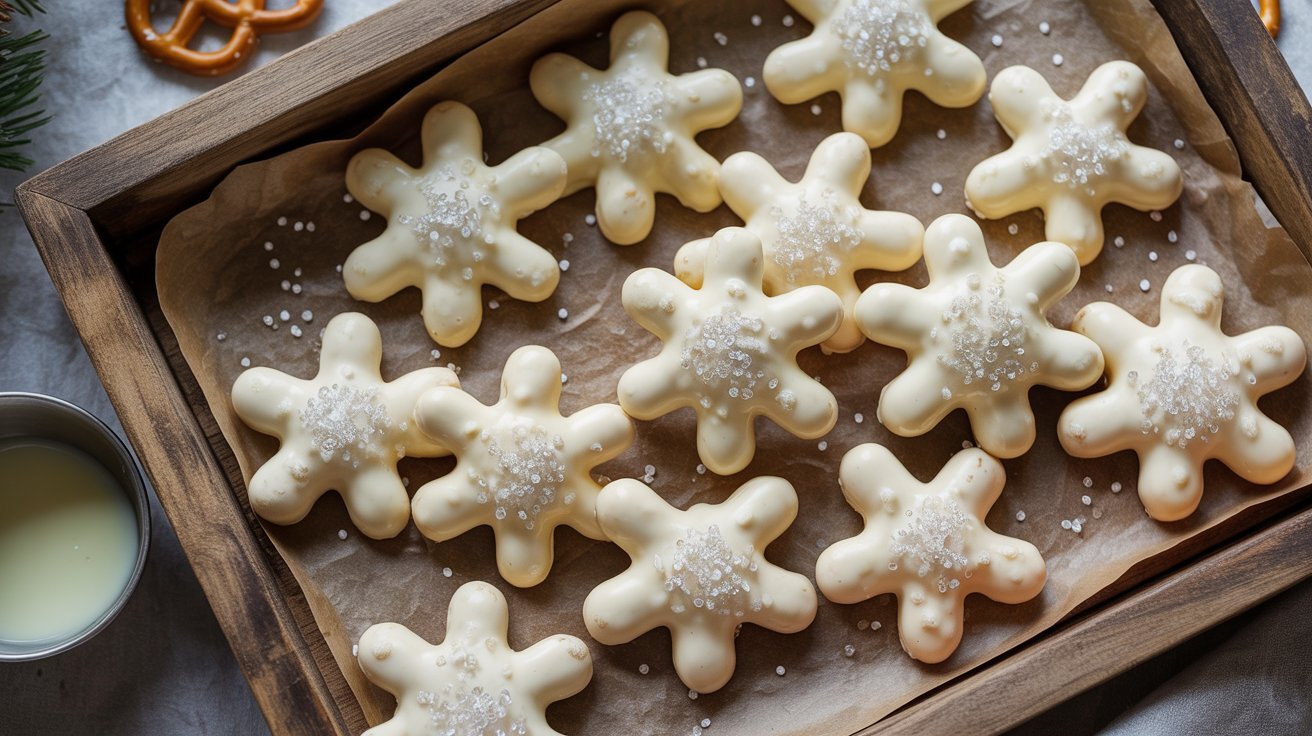
Pretzel Snowflakes are one of those festive treats that instantly make a dessert table feel magical. These crunchy little snowflakes combine salty pretzels with creamy white chocolate for a sweet-and-salty bite that’s almost impossible to stop eating. They look beautiful, taste amazing, and come together with surprisingly little effort, which makes them perfect for busy holiday baking days.
What makes this recipe special is how simple ingredients turn into something that looks bakery-worthy. In my experience, recipes like this are always the first to disappear at holiday parties because they’re fun, bite-sized, and incredibly addictive. I’ve noticed kids especially love helping assemble the snowflake shapes before dipping them into melted chocolate.
These Pretzel Snowflakes are ideal for Christmas dessert platters, edible gifts, cookie exchanges, or cozy winter movie nights. The crisp pretzel texture, smooth chocolate coating, and delicate sparkle from the toppings create a treat that feels festive in every bite. They’re easy enough for beginners but pretty enough to impress everyone at the table.
Why You’ll Love This Recipe
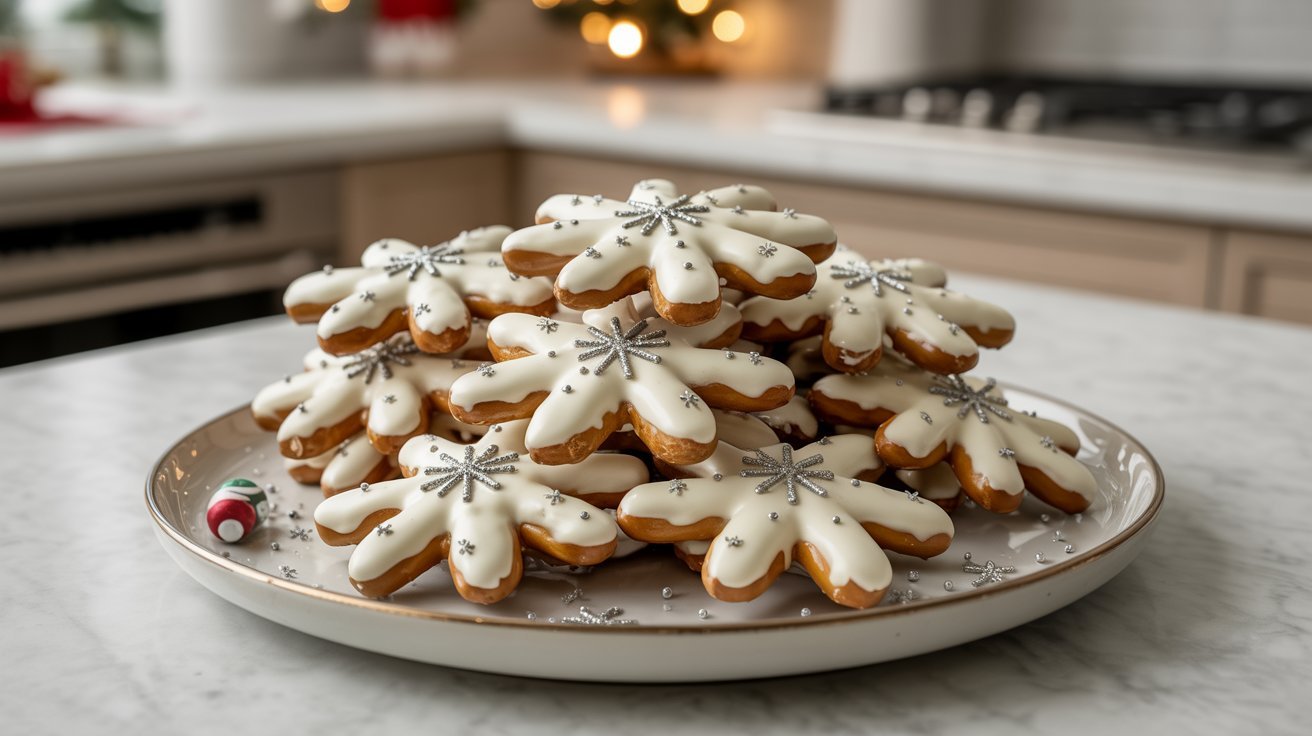
These Pretzel Snowflakes are the kind of holiday treat that checks every box. They’re quick to make, visually stunning, and packed with that irresistible sweet-and-salty flavor combination people crave during the holidays. Even better, you don’t need advanced baking skills or fancy equipment to make them look impressive.
One thing I’ve tried with this recipe is making large batches for holiday gifting, and they hold up beautifully. The pretzels stay crisp while the chocolate adds a smooth, creamy finish that balances every bite perfectly. I’ve also noticed they’re great for last-minute dessert ideas because they require very little prep time.
You’ll love how customizable they are too. Add colorful sprinkles, crushed candy canes, edible glitter, or mini candies to match any holiday theme. They’re festive, beginner-friendly, and perfect for Pinterest-worthy holiday dessert spreads.
Ingredients
- 10 small pretzel twists
- 10 mini pretzel sticks
- 2 cups white chocolate melting wafers
- 2 tablespoons holiday sprinkles
- 1 tablespoon edible silver sugar crystals
- 1 teaspoon coconut oil
- 20 mini candy pearls
- Parchment paper for setting
- 1 tablespoon crushed peppermint candy
- 1 teaspoon vanilla extract
How to Make It
Step 1
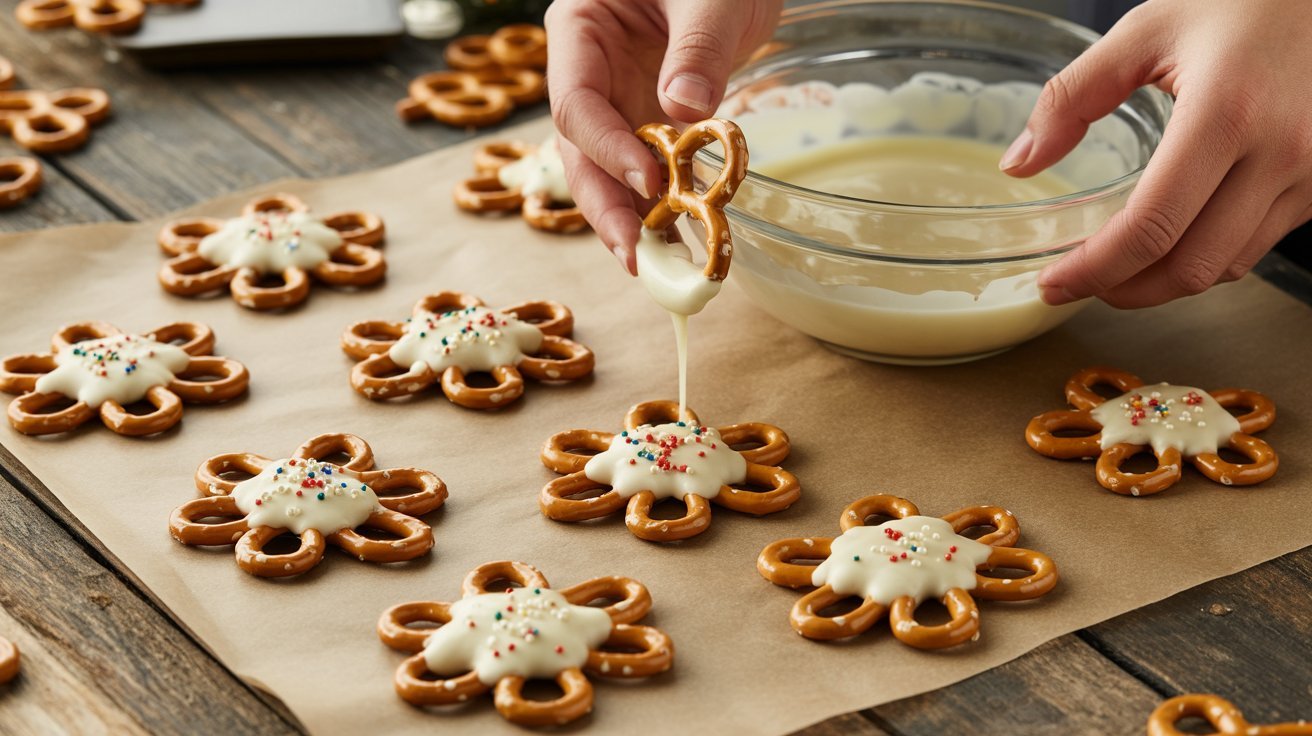
Start by preparing a large baking tray or flat surface lined with parchment paper. This step helps prevent the melted chocolate from sticking later. Arrange your pretzel twists into snowflake shapes by placing six pretzels in a circle with the smaller openings meeting in the center. Add tiny pretzel sticks between them if you want a more detailed snowflake appearance. In my experience, laying out all the snowflakes before melting the chocolate makes the process much smoother and less stressful. It also helps you see how many treats you’ll end up with before decorating begins.
Step 2
Place the white chocolate melting wafers into a microwave-safe bowl along with the coconut oil. Heat in short 20-second intervals, stirring well after each round until the chocolate becomes smooth and glossy. Avoid overheating because white chocolate can become thick and grainy very quickly. I’ve noticed using coconut oil gives the coating a silkier finish and makes dipping much easier. Once melted, stir in the vanilla extract for a subtle bakery-style flavor that pairs beautifully with the salty pretzels and festive toppings in this holiday recipe.
Step 3
Using a spoon, carefully drizzle a small amount of melted white chocolate into the center of each pretzel snowflake to help hold the pieces together. Let the chocolate spread naturally between the pretzel openings. This creates a stable base before fully coating the snowflakes later. Be gentle during this step because the pretzel pieces can shift easily. In my experience, allowing the snowflakes to sit for two or three minutes after this step helps everything stay firmly connected and makes dipping much easier in the next stages of preparation.
Step 4
Once the centers have slightly set, use a spoon or fork to drizzle more melted white chocolate over the entire pretzel snowflake. You want enough coating to secure the shape while still letting some of the pretzel texture remain visible. The contrast between the creamy white coating and golden pretzel edges makes these treats look extra festive. I’ve tried fully dipping them before, but a drizzle method often creates prettier snowflake details. Work slowly and evenly so every piece gets coated without becoming overly thick or heavy with chocolate.
Step 5
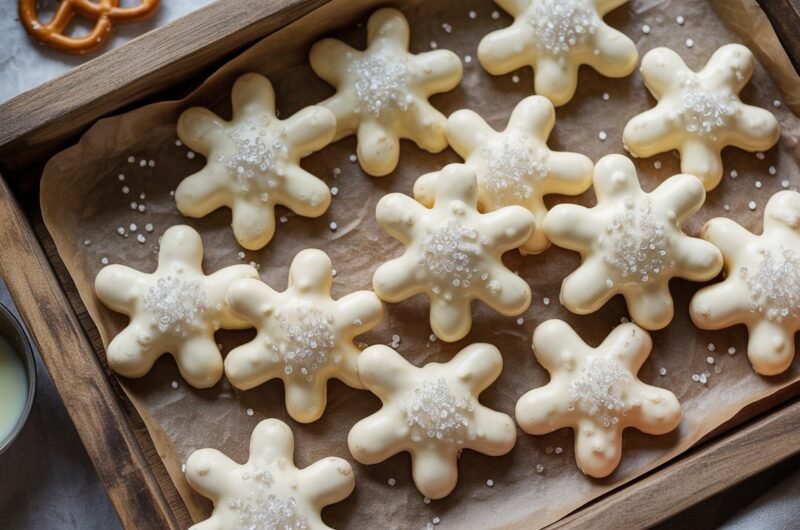
Immediately decorate each Pretzel Snowflake before the chocolate hardens. Sprinkle holiday sugar crystals, mini candy pearls, crushed peppermint, or festive sprinkles across the surface. This part is especially fun because every snowflake can look slightly different. I’ve noticed using silver sugar crystals gives the treats a sparkling snow-like finish that photographs beautifully for Pinterest and holiday dessert boards. Try not to overload the toppings so the delicate snowflake shape still stands out clearly. The balance of textures makes every bite feel festive, crunchy, creamy, and slightly refreshing.
Step 6
Allow the decorated snowflakes to rest at room temperature for about 20 minutes or place them in the refrigerator for faster setting. The chocolate should become firm and slightly glossy once hardened. Avoid stacking them too soon because the decorations can smudge or stick together. In my experience, chilling them briefly also makes the pretzels taste crunchier. This waiting step may feel simple, but it’s important for achieving clean, professional-looking treats that hold their shape beautifully when served at parties or packaged as homemade holiday gifts for friends and family.
Step 7
Carefully lift each Pretzel Snowflake from the parchment paper once fully set. Arrange them on a serving tray, dessert board, or holiday cookie platter for the prettiest presentation. These treats look especially beautiful surrounded by powdered sugar or small festive decorations. I’ve seen this recipe work wonderfully for Christmas parties because guests can grab them easily without needing plates or utensils. The creamy sweetness from the white chocolate combined with the crisp salty pretzels creates a flavor combination that keeps people reaching for another snowflake almost immediately after the first bite.
Cooking Tips / Variations
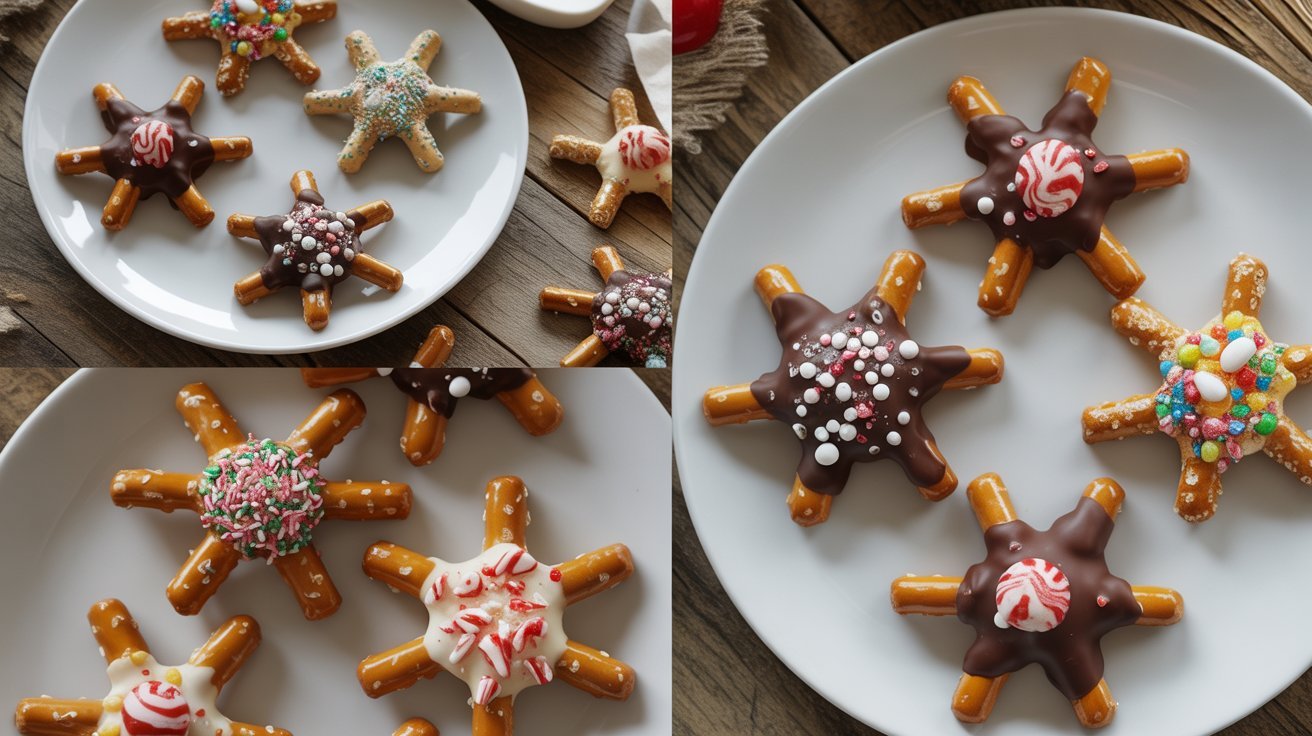
One helpful tip for making Pretzel Snowflakes is to work in small batches when melting chocolate. White chocolate hardens quickly, especially during colder months, so keeping it smooth makes decorating much easier. If it starts thickening, gently reheat it for a few seconds and stir again.
You can also switch up the flavors depending on the occasion. I’ve tried using dark chocolate and milk chocolate versions, and both taste incredible with the salty pretzels. Adding crushed peppermint gives them a refreshing holiday flavor, while colorful sprinkles make them fun for kids’ parties.
For a more elegant look, drizzle contrasting chocolate over the top after the first coating sets. These small touches make the recipe feel extra special without adding much extra work.
Serving or Storage Tips
Pretzel Snowflakes are best served slightly chilled or at cool room temperature so the chocolate stays crisp and smooth. They look beautiful on holiday dessert trays alongside cookies, fudge, and peppermint treats. In my experience, adding them to edible gift boxes instantly makes homemade holiday gifts feel more thoughtful and festive.
Store the snowflakes in an airtight container with parchment paper between layers to prevent sticking. They stay fresh for about one week at room temperature in a cool area. If your kitchen runs warm, refrigerating them is a safer option.
I’ve noticed these treats also freeze surprisingly well. Just place them in a sealed container and thaw gently before serving for the best texture and flavor.
Conclusion
Pretzel Snowflakes are the perfect combination of festive beauty, sweet creamy chocolate, and crunchy salty pretzels. They’re simple enough for beginner bakers but impressive enough to become the highlight of a holiday dessert table. From holiday parties to edible gifts, this recipe brings a cozy homemade touch that everyone appreciates.
What makes these treats so special is how easy they are to customize while still looking elegant and Pinterest-worthy. Whether you decorate them with sparkling sugar, peppermint, or colorful sprinkles, every batch feels unique and fun to make.
Save these Pretzel Snowflakes for your next holiday baking day, share them with family and friends, and enjoy every crunchy, festive bite together.
Pretzel Snowflakes
10
servings20
minutes5
minutes25
minutesPretzel Snowflakes are festive holiday treats made with crunchy pretzels, creamy white chocolate, and sparkling seasonal toppings. They’re quick, beginner-friendly, and perfect for Christmas dessert platters, edible gifts, or cozy winter celebrations.
Ingredients
10 small pretzel twists
10 mini pretzel sticks
2 cups white chocolate melting wafers
2 tablespoons holiday sprinkles
1 tablespoon edible silver sugar crystals
1 teaspoon coconut oil
20 mini candy pearls
Parchment paper for setting
1 tablespoon crushed peppermint candy
1 teaspoon vanilla extract
How to Make it
- Start by preparing a large baking tray or flat surface lined with parchment paper. This step helps prevent the melted chocolate from sticking later. Arrange your pretzel twists into snowflake shapes by placing six pretzels in a circle with the smaller openings meeting in the center. Add tiny pretzel sticks between them if you want a more detailed snowflake appearance. In my experience, laying out all the snowflakes before melting the chocolate makes the process much smoother and less stressful. It also helps you see how many treats you’ll end up with before decorating begins.
- Place the white chocolate melting wafers into a microwave-safe bowl along with the coconut oil. Heat in short 20-second intervals, stirring well after each round until the chocolate becomes smooth and glossy. Avoid overheating because white chocolate can become thick and grainy very quickly. I’ve noticed using coconut oil gives the coating a silkier finish and makes dipping much easier. Once melted, stir in the vanilla extract for a subtle bakery-style flavor that pairs beautifully with the salty pretzels and festive toppings in this holiday recipe.
- Using a spoon, carefully drizzle a small amount of melted white chocolate into the center of each pretzel snowflake to help hold the pieces together. Let the chocolate spread naturally between the pretzel openings. This creates a stable base before fully coating the snowflakes later. Be gentle during this step because the pretzel pieces can shift easily. In my experience, allowing the snowflakes to sit for two or three minutes after this step helps everything stay firmly connected and makes dipping much easier in the next stages of preparation.
- Once the centers have slightly set, use a spoon or fork to drizzle more melted white chocolate over the entire pretzel snowflake. You want enough coating to secure the shape while still letting some of the pretzel texture remain visible. The contrast between the creamy white coating and golden pretzel edges makes these treats look extra festive. I’ve tried fully dipping them before, but a drizzle method often creates prettier snowflake details. Work slowly and evenly so every piece gets coated without becoming overly thick or heavy with chocolate.
- Immediately decorate each Pretzel Snowflake before the chocolate hardens. Sprinkle holiday sugar crystals, mini candy pearls, crushed peppermint, or festive sprinkles across the surface. This part is especially fun because every snowflake can look slightly different. I’ve noticed using silver sugar crystals gives the treats a sparkling snow-like finish that photographs beautifully for Pinterest and holiday dessert boards. Try not to overload the toppings so the delicate snowflake shape still stands out clearly. The balance of textures makes every bite feel festive, crunchy, creamy, and slightly refreshing.
- Allow the decorated snowflakes to rest at room temperature for about 20 minutes or place them in the refrigerator for faster setting. The chocolate should become firm and slightly glossy once hardened. Avoid stacking them too soon because the decorations can smudge or stick together. In my experience, chilling them briefly also makes the pretzels taste crunchier. This waiting step may feel simple, but it’s important for achieving clean, professional-looking treats that hold their shape beautifully when served at parties or packaged as homemade holiday gifts for friends and family.
- Carefully lift each Pretzel Snowflake from the parchment paper once fully set. Arrange them on a serving tray, dessert board, or holiday cookie platter for the prettiest presentation. These treats look especially beautiful surrounded by powdered sugar or small festive decorations. I’ve seen this recipe work wonderfully for Christmas parties because guests can grab them easily without needing plates or utensils. The creamy sweetness from the white chocolate combined with the crisp salty pretzels creates a flavor combination that keeps people reaching for another snowflake almost immediately after the first bite.
Notes
- White chocolate melts more smoothly when heated slowly in short intervals.
- Decorate the snowflakes immediately before the chocolate hardens.
- Use parchment paper to prevent sticking and make cleanup easier.
- These treats are perfect for holiday gifting and cookie exchanges.
- Store in a cool place to keep the pretzels crisp and fresh.
FAQ 1: Can I make Pretzel Snowflakes ahead of time?
Yes, Pretzel Snowflakes are a great make-ahead holiday treat. You can prepare them several days before serving and store them in an airtight container. I’ve found they stay crisp and fresh for about a week when kept in a cool, dry place away from direct heat or sunlight.
FAQ 2: What type of chocolate works best for Pretzel Snowflakes?
White chocolate melting wafers work best because they melt smoothly and harden evenly. You can also use almond bark or high-quality white chocolate bars. I’ve noticed regular white chocolate chips sometimes become thick or grainy unless mixed with a little coconut oil during melting.
FAQ 3: Can I use different toppings for Pretzel Snowflakes?
Absolutely. Pretzel Snowflakes are very customizable. Popular toppings include crushed candy canes, mini candies, sprinkles, edible glitter, or even chopped nuts. For a more elegant version, try silver sugar pearls or a drizzle of dark chocolate over the finished snowflakes.
FAQ 4: How do I keep the pretzels from falling apart?
The key is using enough melted chocolate in the center to secure the pretzel pieces together before decorating. Letting the base set slightly before fully coating also helps. In my experience, assembling the snowflakes on parchment paper keeps everything stable and easier to handle.
FAQ 5: Can I freeze Pretzel Snowflakes?
Yes, these treats freeze very well. Place them in a sealed freezer-safe container with parchment paper between layers. When ready to serve, thaw them slowly in the refrigerator or at room temperature. This helps the chocolate stay smooth while keeping the pretzels crunchy and fresh.